Blog

  • The Best Productivity Applications For Lawyers in 2022

    The Best Productivity Applications For Lawyers in 2022

    Sometimes the biggest challenge is getting everything you need to get done in a limited time. Optimizing your time to be as productive and efficient as possible can be a strategy to overcome time constraints. But where can you start? Productivity applications.

    How to Increase Productivity Through Applications

    Liz McCausland will walk you through some highlighted productivity applications to improve aspects of your practice. From task management to note-taking to scheduling, there’s a solution to increasing productivity. We’ll share tips and tricks to increasing your productivity, how to automate parts of your workflow, and how to manage technology.

    Meet Your Host: Liz McCausland

    Liz is a legal tech consultant and a proud double gator grad from the University of Florida, Liz has practiced law for over 20 years. She is a Past President of the Orange County Bar Association, serves on the Executive Council of the Florida Bar’s Solos Small Firm section, and has been a speaker at several conferences and podcasts. Liz also travels throughout the US teaching other attorneys and mediators how to successfully obtain and mediate mortgage modifications in bankruptcy.

    Get in touch with Liz through her websiteLinkedIn, or on Facebook!

    Watch the Webinar on Demand

    You can watch the webinar on demand on YouTube or below.

    https://youtube.com/watch?v=ENARdpLVw-Y%3Fcontrols%3D1%26rel%3D0%26playsinline%3D0%26cc_load_policy%3D0%26autoplay%3D0%26enablejsapi%3D1%26origin%3Dhttps%253A%252F%252Flegalboards.com%26widgetid%3D1%26forigin%3Dhttps%253A%252F%252Flegalboards.com%252Fresources%252Fwebinars%252Fthe-best-productivity-applications-for-lawyers-in-2022%252F%26aoriginsup%3D1%26gporigin%3Dhttps%253A%252F%252Flegalboards.com%252Fwp-admin%252Fedit.php%253Fpost_type%253Dpost%2526paged%253D4%26vf%3D1

    Ready to Improve Your Firm’s Productivity?

    Check out our other resources for more help with finding the right tech stack for youautomating your workflow, and more!

    Curious about how Legalboards can help with the way you work? Learn more about our time-saving features here.

  • Cultivating a Mindset: Essential Management Books

    Cultivating a Mindset: Essential Management Books

    3 Essential Management Books for Lawyers

    Law school traditionally teaches students how to think like lawyers, not how to manage the business side of a law firm. However, practicing law is a profession and a business, and although each requires different skills, attorneys must master both to be successful. Here are some books that aim to school lawyers in what it takes to run a prosperous law practice: 

    Book 1: Attorney and Law Firm Guide to the Business of Law: Planning and Operating for Survival and Growth, Third Edition by Edward Poll

    Ed Poll, a respected columnist and management consultant with over 40 years of experience in business and law, celebrated the 20th anniversary of this book with an updated third edition. “Attorney and Law Firm Guide to the Business of Law,” addresses all aspects of running a law practice and helps lawyers understand business functions like finance, marketing, and human resources. It also provides valuable suggestions for technology tools.

    Modern practices require updated solutions, not more of the same. In this book, Poll helps lawyers understand what has changed within the legal industry, and how they can adapt, adopt, and innovate their practices. Whether you’re just starting out or looking to update your operation, this book can put you on the road to success. 

    Book 2: Smart Collaboration: How Professionals and Their Firms Succeed by Breaking Down Silos by Heidi K. Gardner

    For collaboration to be smart, it must be done right. In this book, Harvard Business School professor and lecturer Heidi Gardner explains why collaborating across silos is messy, risky, and expensive and how to do it more effectively. In “Smart Collaboration,” Gardner explains how firms earn can increase income, encourage client loyalty, attract and retain top talent, and be more competitive when they know how to effectively collaborate. 

    Published through Harvard Business Review (HBR), this book provides actionable insights into how to better develop teams, business plans, and improve the bottom line. Gardner has received praise for her clear methodology and how helpful the book is for any firm providing knowledge-based service.

    Book 3: How to Do More in Less Time: The Complete Guide to Increasing Your Productivity and Improving Your Bottom Line by Allison C Shields and Daniel J Siegel

    Time is money for lawyers, and although most attorneys work long hours, many still do not have enough time to get everything done – not even considering the business aspects of their job like marketing, business development, and strategic planning. 

    How to Do More in Less Time,” offers helpful tips and tricks on how to get and stay organized while navigating time constraints. The focus is on combining the authors’ programs to improve productivity – encouraging readers prioritize tasks, eliminate bad habits, and adopt new strategies. Want to do 90 minutes’ worth of work in 60 minutes, or maybe even 30 minutes? This book is for you.

    Ready to Boost Productivity with Technology?

    Our automated practice management solution can help your legal team maximize productivity and fit in time for essential business management activities. To learn more, contact us today.

  • Automating Practice Management: Start with Workflow, Not Tools

    Automating Practice Management: Start with Workflow, Not Tools

    Most law firms don’t struggle with automation because they lack tools.

    They struggle because work breaks between steps.

    If you automate tasks before you fix how work moves, you don’t get clarity.

    You just move confusion faster.

    Automation needs something stable to attach to.

    A clear workflow.

    So the question is simple: where do you actually start?

    If you want a full breakdown of how workflow automation works in law firms, start here.

    Why most law firm automation projects start in the wrong place

    Most firms start automation in one of three ways.

    They start with tools.

    They buy something that promises automation, then try to force their work into it.

    They start with isolated tasks.

    They automate a form, a reminder, or an email, but the matter still has no structure.

    They start with symptoms.

    They add more reminders because things keep slipping.

    • More alerts.
    • More checklists.
    • More “did you get my email?”

    Here is the problem.

    Automation needs a defined workflow.

    If your team does not agree on what stage a matter is in, no automation can fix that.

    If nobody owns moving work forward, automation will just create more noise.

    Practice management automation works when it makes work move.

    Not when it adds more messages.

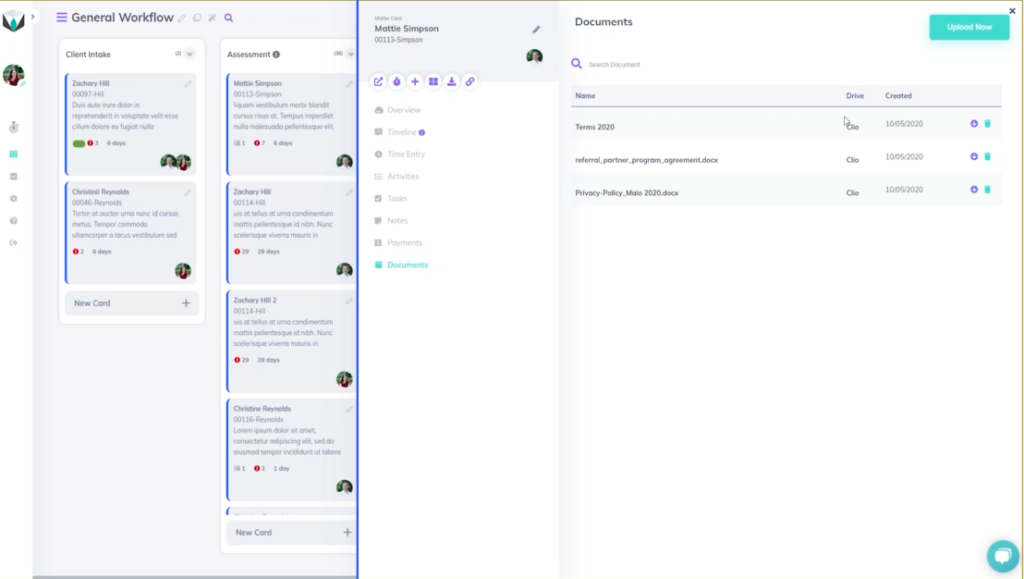
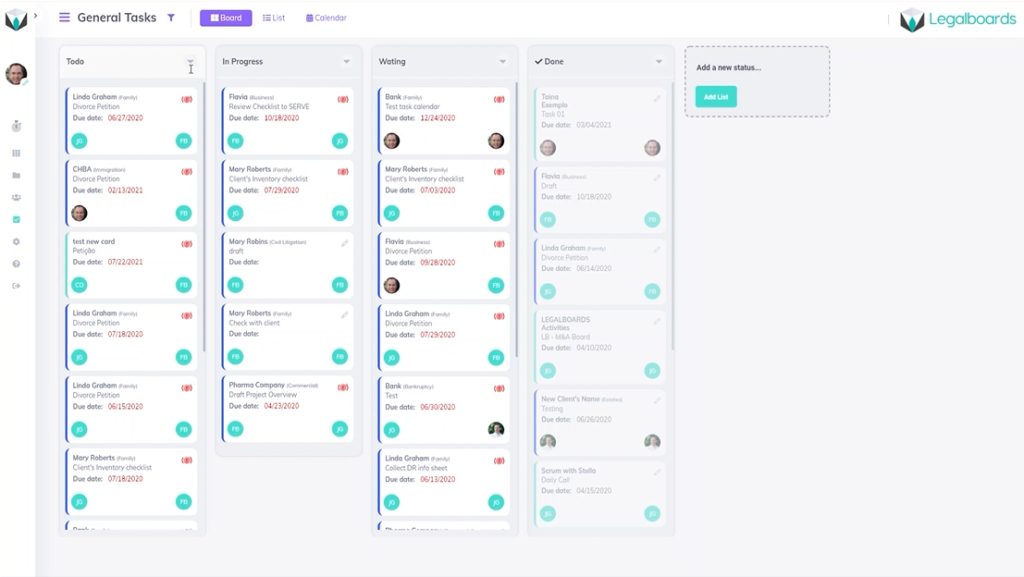
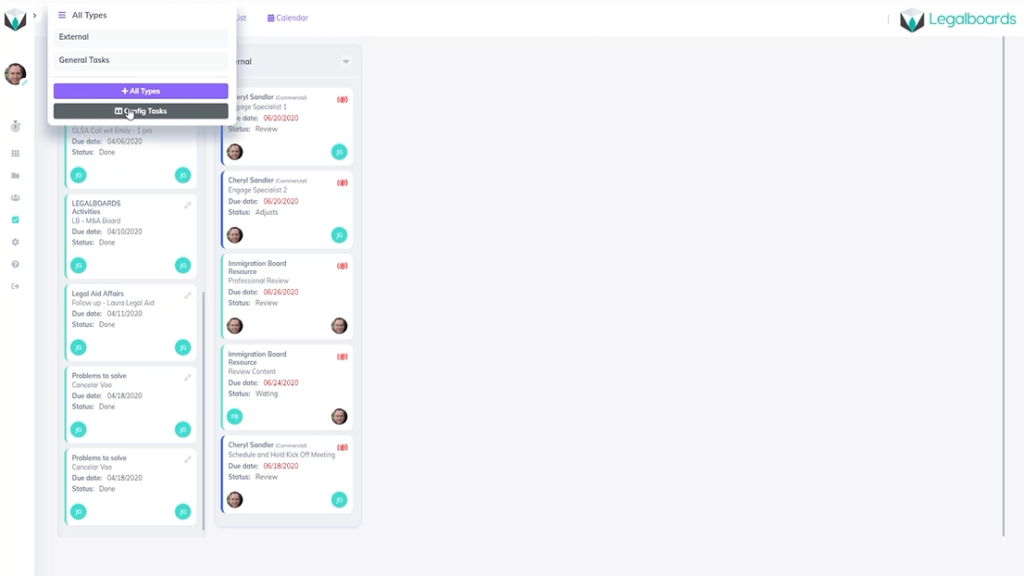
    What to automate first in law firm practice management

    Don’t start with tasks.

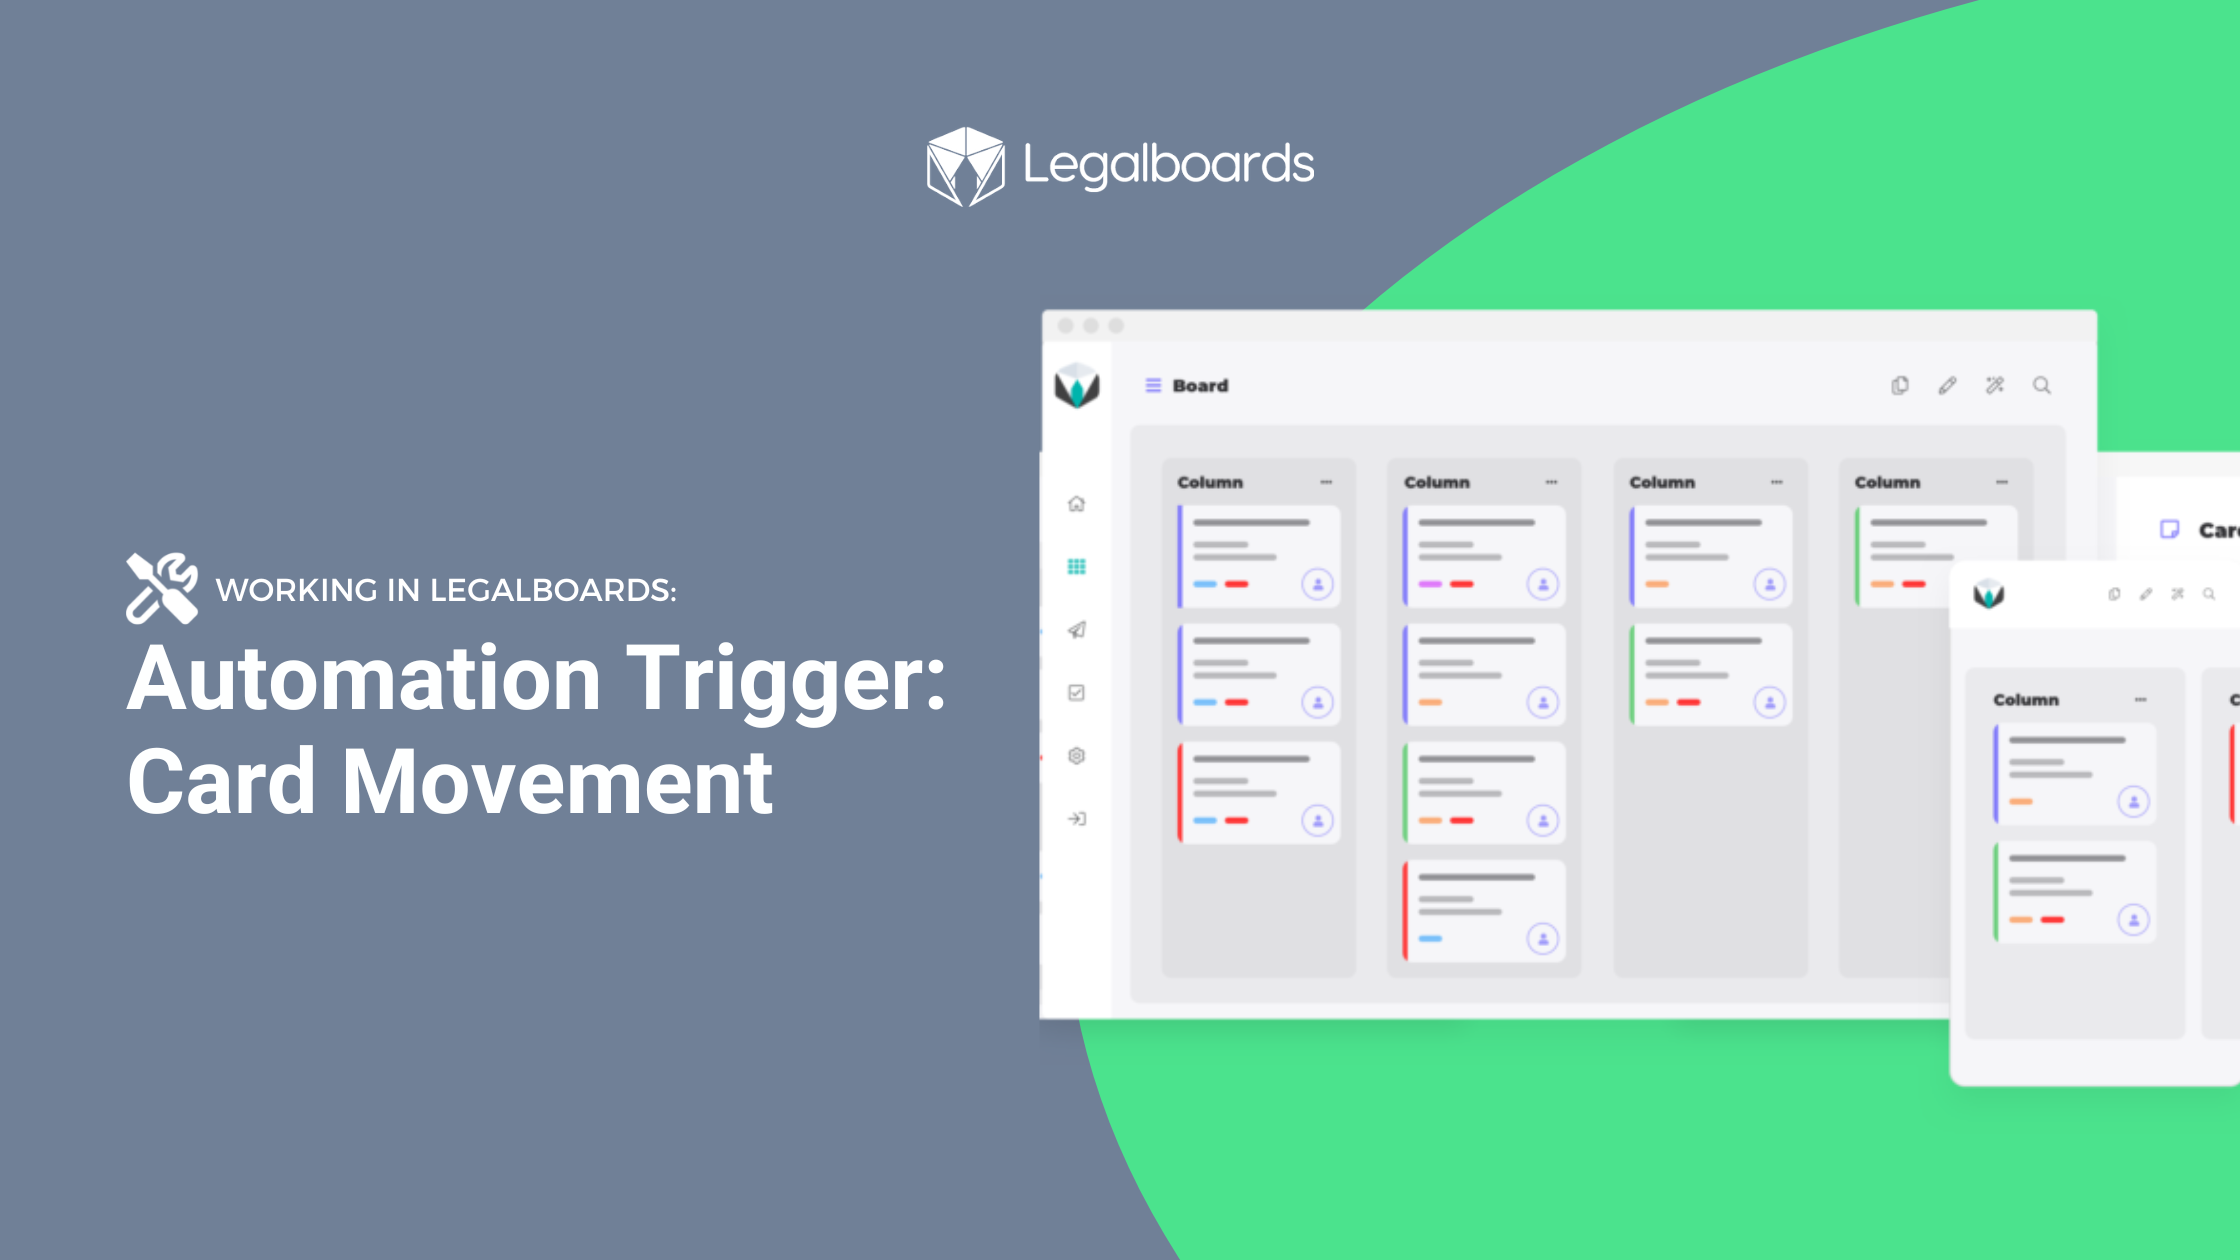
    Start with where work moves or gets stuck.

    Think in workflow mechanics.

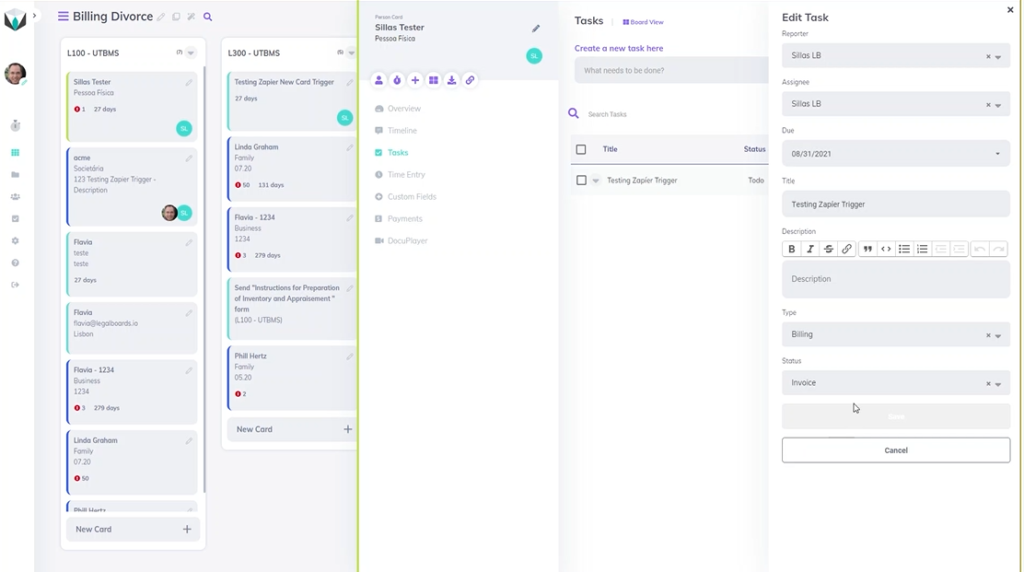
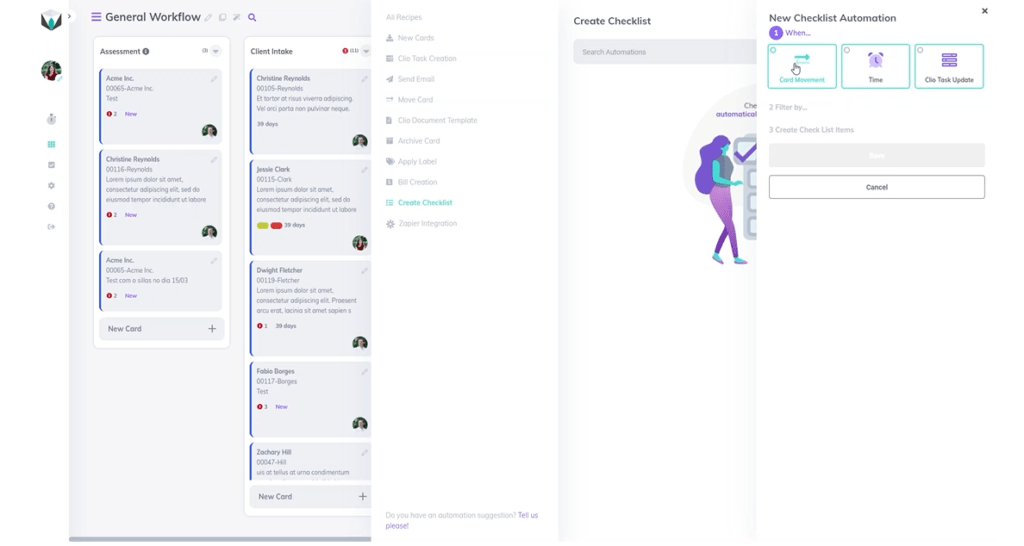
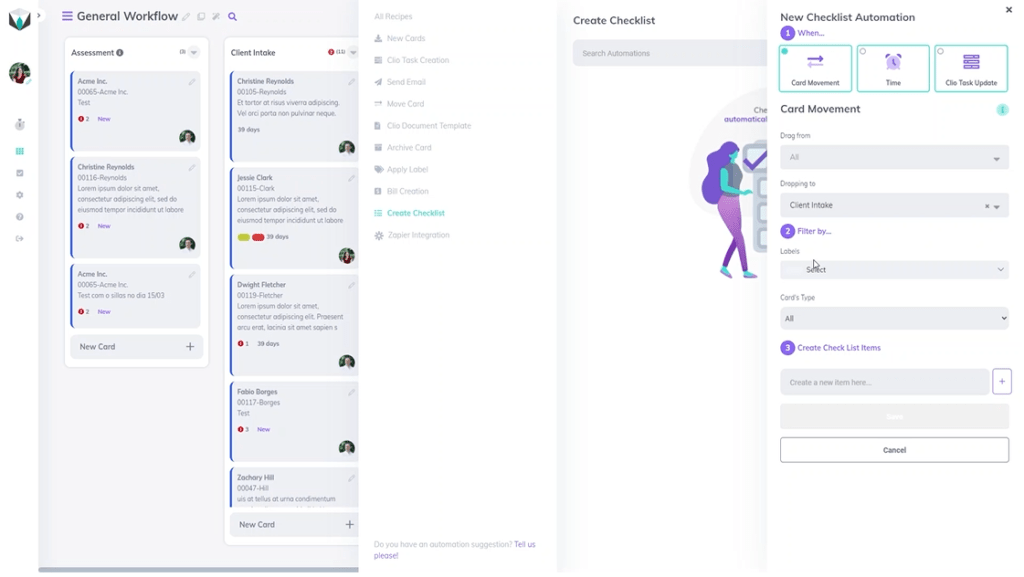
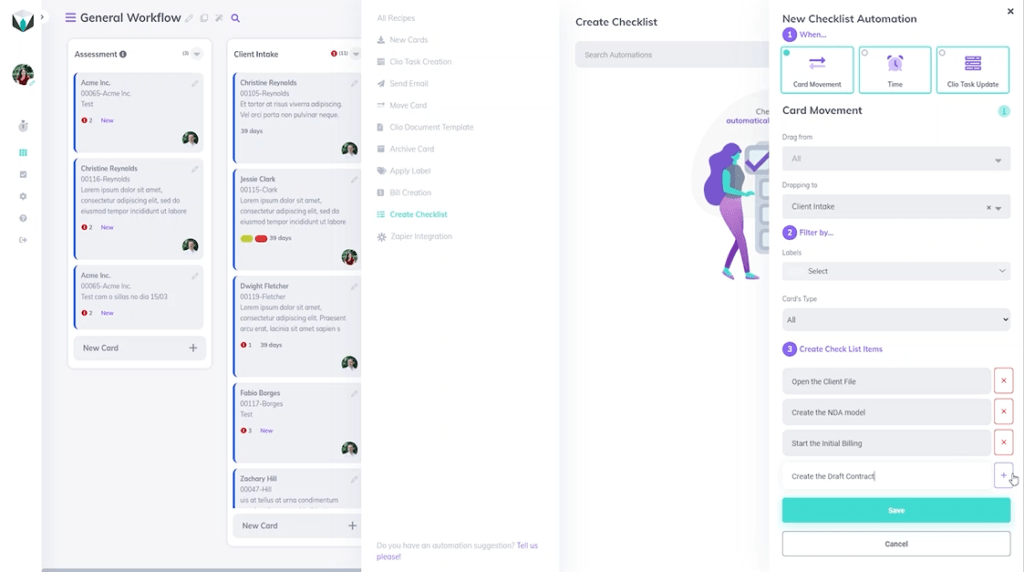
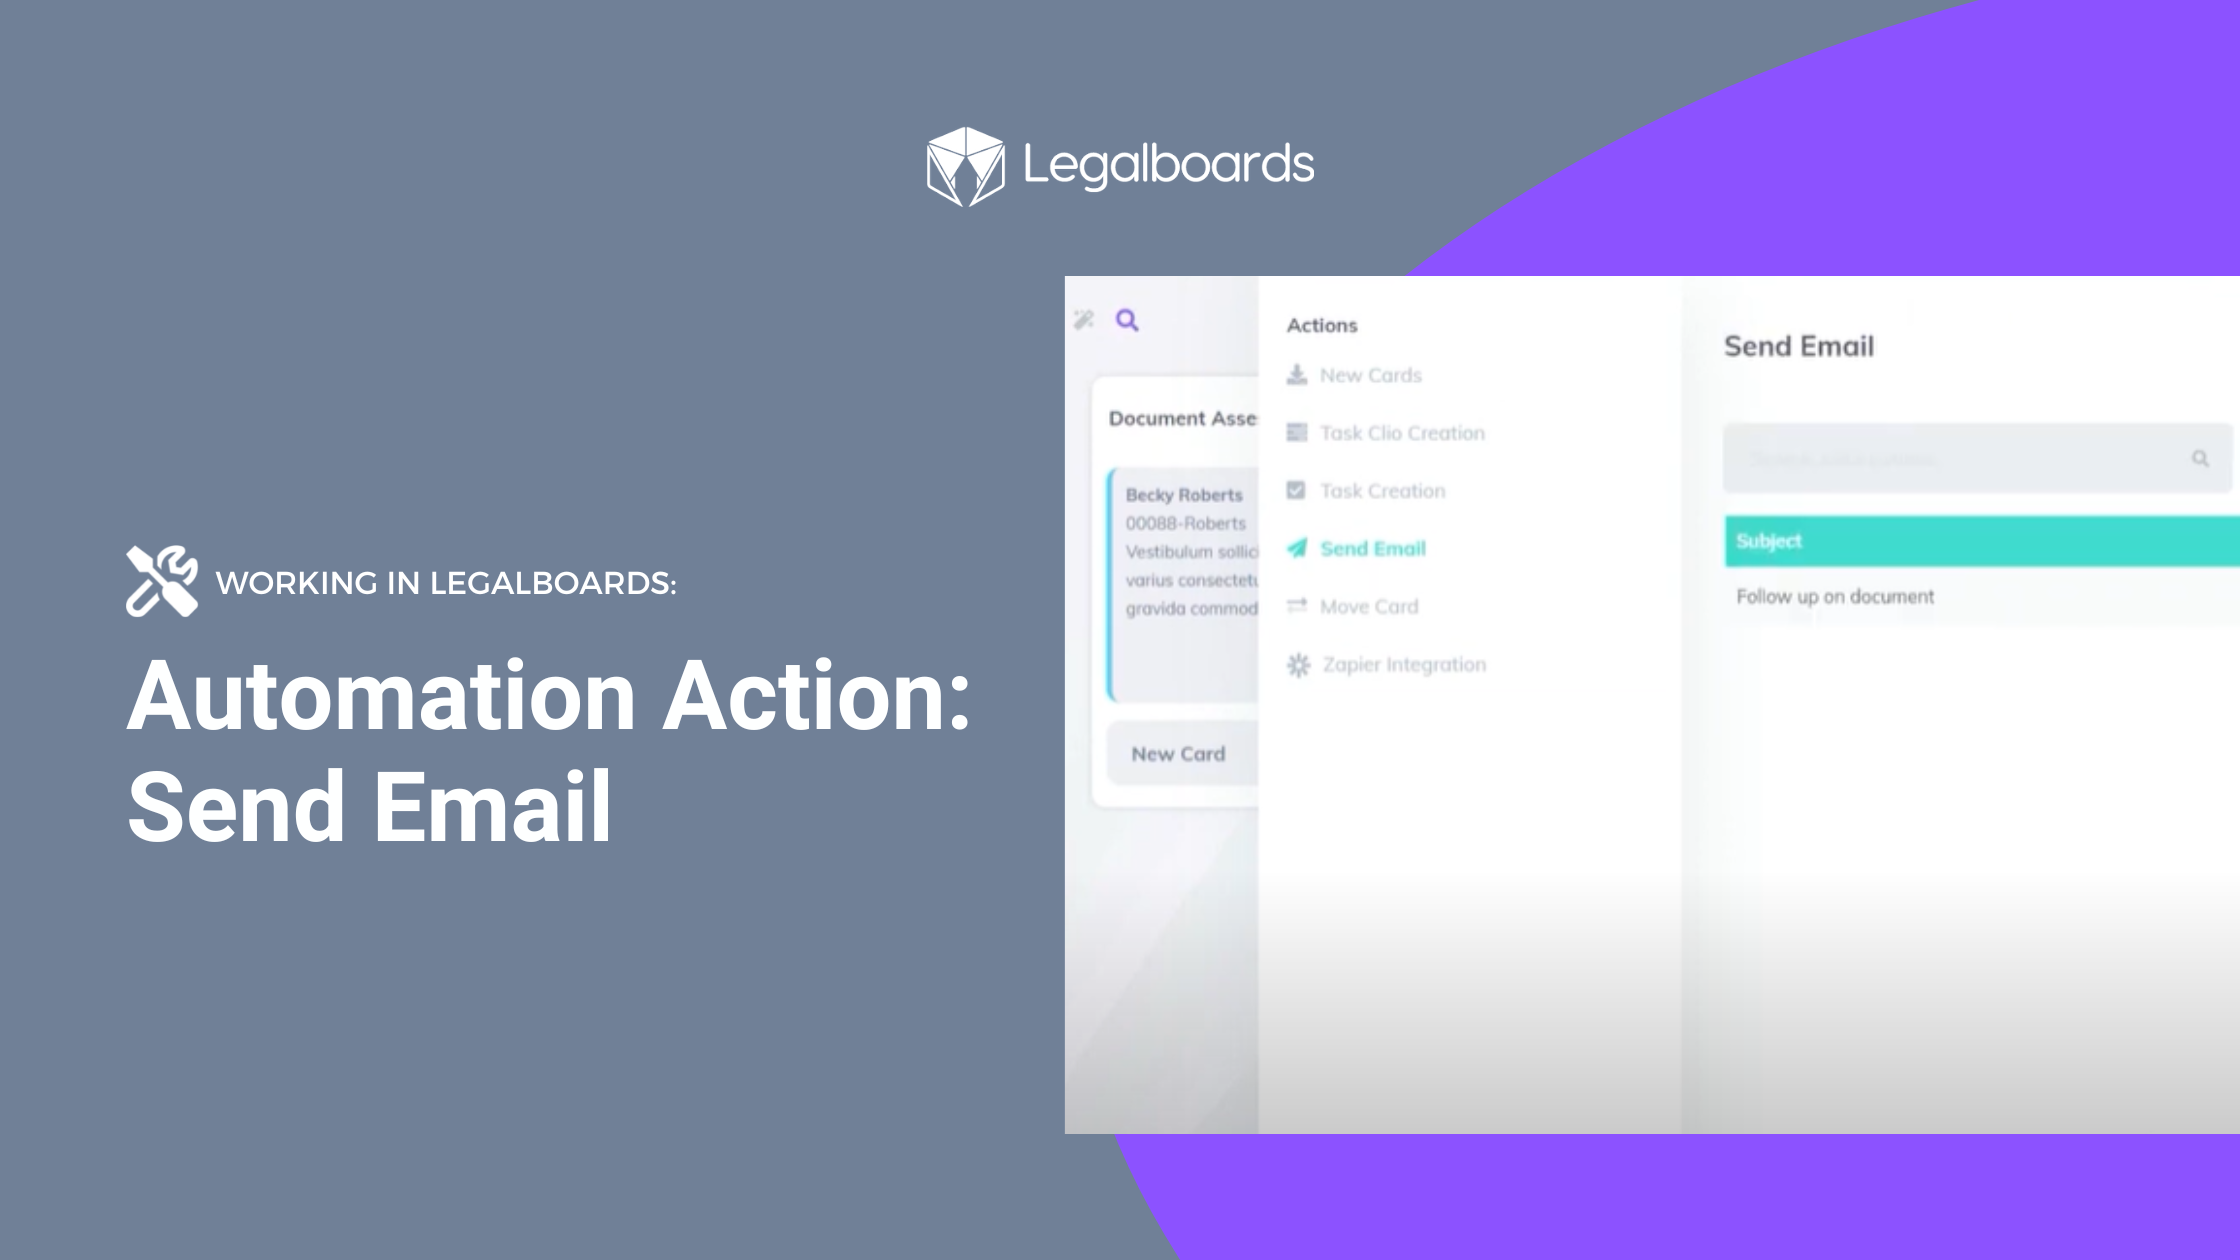
    Automate repeated workflow transitions

    A transition is when work should move from one stage to the next.

    Most firms already have these moments.

    They just handle them manually through email and memory.

    Examples:

    • Retainer signed, create kickoff tasks automatically
    • Documents received, create a review step and assign it
    • Draft approved, trigger send or file tasks

    This removes handoff friction.

    When the stage changes, the next work appears.

    Automate follow-up points where work usually stalls

    Most operational pain is waiting.

    • Waiting on client
    • Waiting on signature
    • Waiting on internal review
    • Waiting on missing documents

    If your system does not make waiting visible, your team will chase updates all day. That is where operational visibility matters most.

    Two rules:

    • Make “waiting” a real stage
    • Make waiting owned

    Even if the delay is external, someone owns moving it forward.

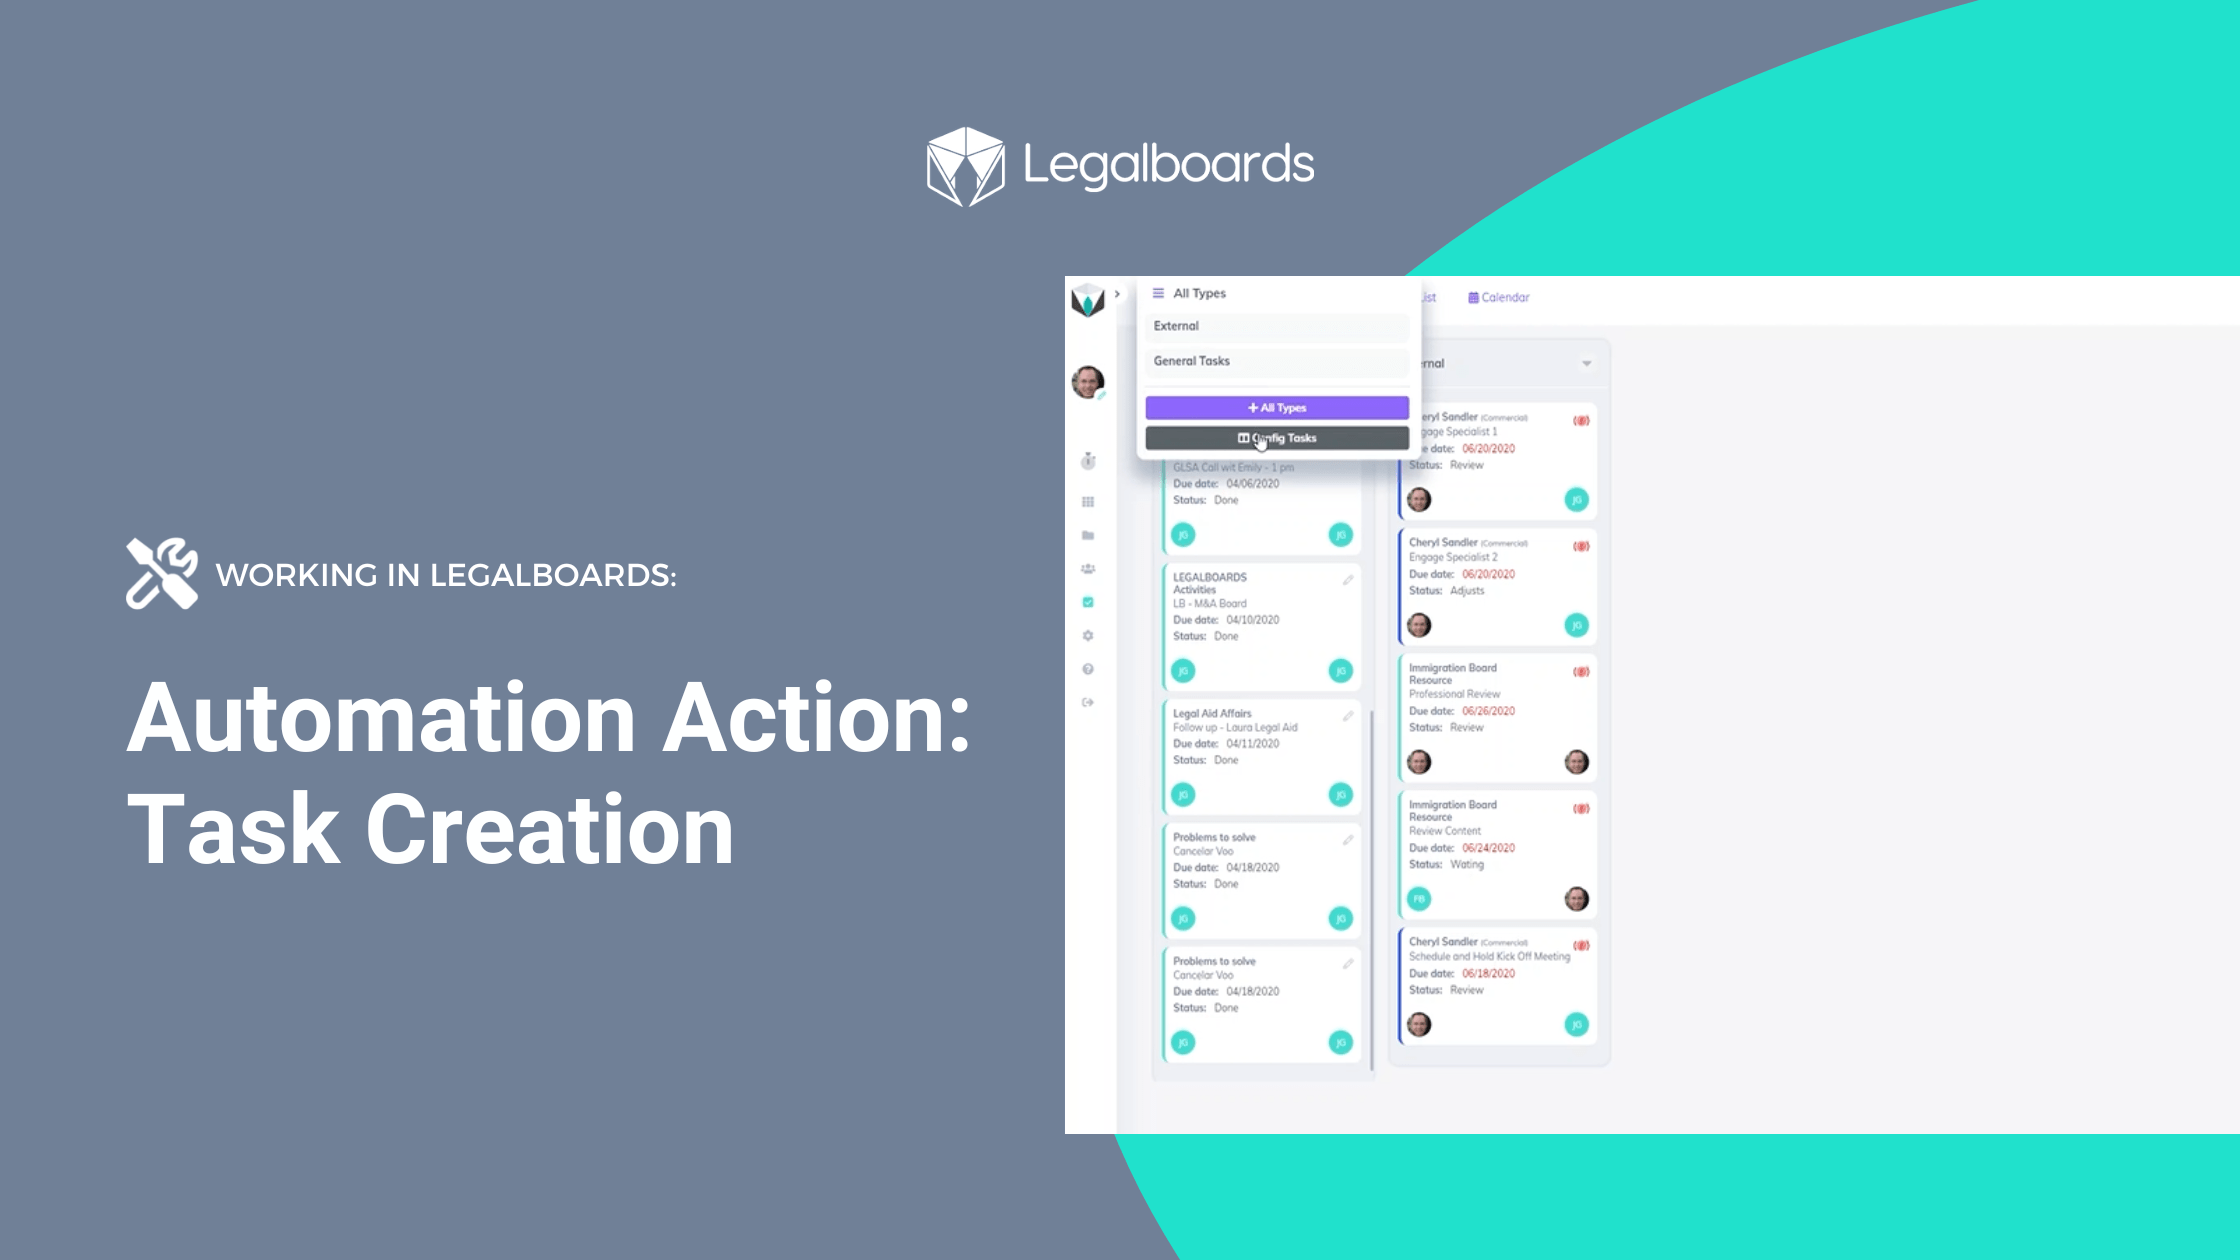
    Automate administrative steps after structure is clear

    Only after stages and ownership are defined should you automate admin work.

    Examples:

    • Billing reminders tied to a real stage
    • Client updates triggered by actual progress
    • Recurring tasks for predictable routines

    If you automate admin too early, you send updates that are wrong or premature.

    That breaks trust.

    What not to automate yet

    Most automation fails because it starts in the wrong place.

    Do not start here:

    A broken workflow

    If the team cannot describe the stages clearly, stop and define them first.

    Judgment-heavy work

    Legal strategy and decision-making should not be your starting point.

    Exception-heavy work

    If every case is different, automation will become messy fast.

    Anything without a clear “done”

    If you cannot define completion, you cannot automate transitions.

    If you are unsure where to start, this guide helps frame it properly: How to Prepare a Law Firm for Automation

    The 3 best places to start automation

    If you want a clean starting point, focus on where work transitions and stalls.

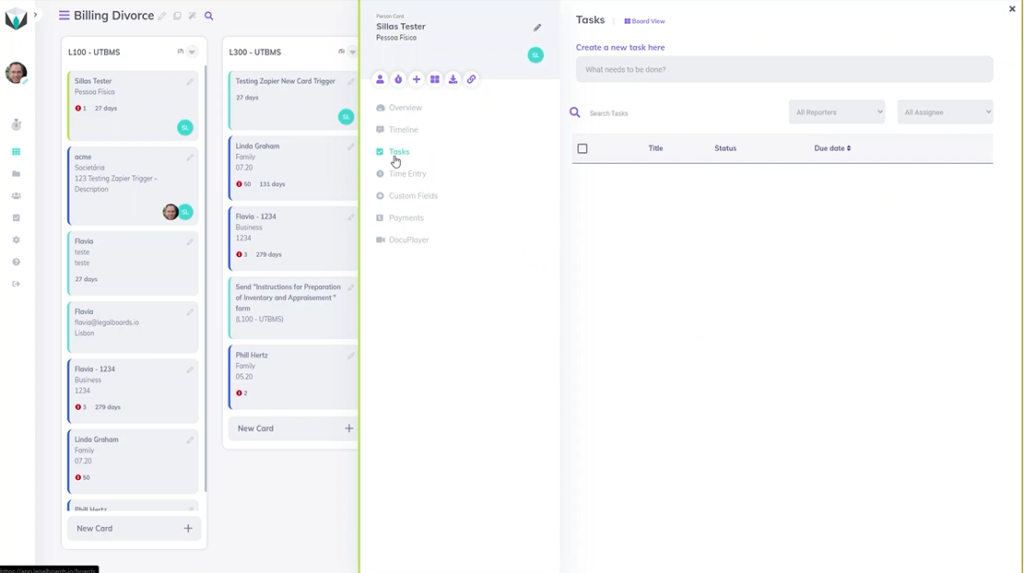
    Matter kickoff and case setup

    This is where many firms start behind.

    Define what “opened” means

    Trigger task plans automatically

    Assign owners immediately

    This sets the tone for the entire matter.

    Waiting states and follow-ups

    This is where most time is lost.

    Make these stages real:

    • Waiting on client
    • Waiting on signature
    • Waiting on internal review

    Then add simple rules:

    • If waiting exceeds X days, escalate
    • If something arrives, move the matter forward
    • If a signature is completed, trigger the next step

    Draft, review, approve, send or file

    This cycle exists in almost every firm.

    Automate the handoffs:

    • Draft complete, create review task
    • Review complete, create approval step
    • Approval complete, trigger send or file

    This reduces unclear ownership and missed handoffs.

    It also reduces deadline risk in law firms.

    How to know if your workflow is ready

    You are ready to automate when these are true.

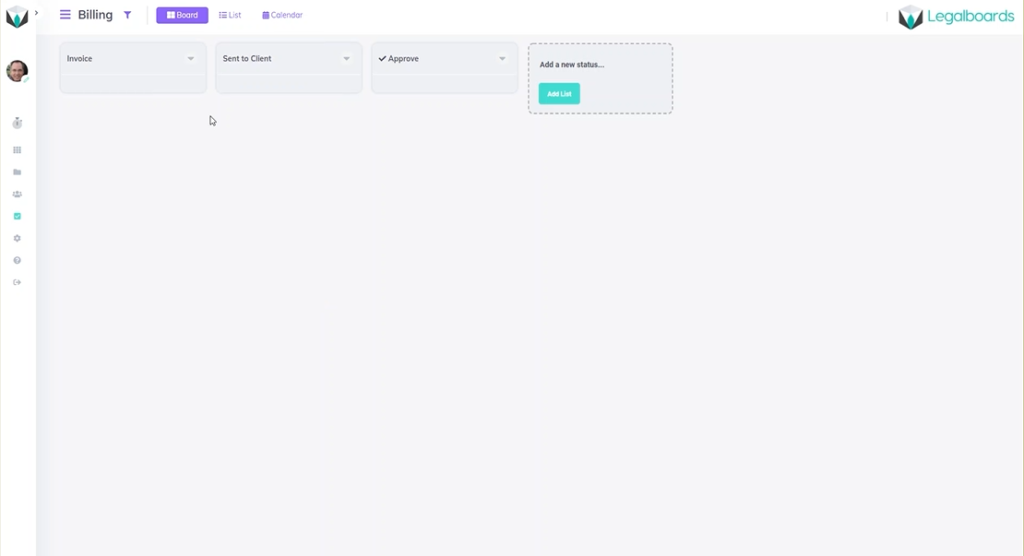
    Your stages are defined

    You can list 5 to 7 stages.

    Each stage has a clear meaning.

    Your entry and exit conditions are clear

    For each stage:

    What moves a matter into it

    What moves it out

    Your ownership is explicit

    Each stage has one owner.

    Not “the team.”

    Not “someone will handle it.”

    One person is responsible for movement.

    Your waiting is visible

    Waiting is a stage.

    Not hidden in email threads.

    You can run a simple test

    Take 10 recent matters.

    Can you place each one into a stage without debate?

    If not, the workflow is not ready.

    Start by mapping one workflow here.

    A simple starting point for small and mid-sized firms

    If you are a 10 to 50 person firm, don’t try to automate everything.

    Start with one workflow.

    Step 1: Pick one high-frequency workflow

    Good options:

    • New matter kickoff
    • A common litigation cycle
    • A standard transaction flow
    • Monthly client reporting

    Pick the one that creates the most follow-ups.

    Step 2: Define the stages

    Keep it simple.

    5 to 7 stages.

    Plain language.

    Step 3: Define ownership

    Assign one owner per stage.

    If this feels uncomfortable, that’s the point.

    Step 4: Automate transitions

    Start with 2 to 3 automations:

    • Stage change creates next tasks
    • Waiting triggers follow-up or escalation
    • Approval triggers next steps

    Run it for two weeks.

    Then improve.

    FAQ

    Do we need new software to start automating practice management?

    No.

    Most firms already have tools with basic automation.

    The real requirement is workflow clarity.

    Should we start with intake automation?

    Only if intake is your biggest pain.

    It is not special.

    It is just another workflow.

    Do we need AI?

    No.

    Rules and triggers solve most early wins.

    AI comes later.

    Who should own automation?

    Usually someone operational:

    • Office manager
    • Paralegal lead
    • Operations lead

    With partner support.

    How long does it take?

    You can build a first version quickly.

    One workflow

    5 to 7 stages

    2 to 3 automations

    Two weeks to test

    The hard part is not building.

    It is defining ownership and “done.”

    Next step

    If your team is still chasing updates, your problem isn’t effort. It’s structure.

    Start with one workflow.

    Define the stages.

    Define ownership.

    Then automate the transitions.

    If you want a simple way to do this, start with the  workflow optimization checklist

  • Google Drive Integration

    Google Drive Integration

    In this guide, we’ll walk you through how to set up and start using the Google Drive integration within Legalboards. Keeping files attached to matters (or cards in Legalboards), can be difficult. File management is often the key to staying organized so you can continue to be productive.

    Our new Google Drive integration allows you to access your files within your Google Drive in your Legalboards account. Now, you can access your files in real time. As well, thanks to the automatic syncing between the Drive and Legalboards, it’s easy to keep matters on track. Even if you’re sending a file found inside a matter, the file is synchronized to reflect any changes made.

    If you’re more of a visual learner, check out our video guide below, or on YouTube. If you need more explanation on how to get started within Legalboards, check out our support portal for more help.

    Integrating Google Drive with Legalboards

    In Legalboards, we’re going to find the “Settings” icon on the left of the screen and select it. In the sub-menu that will appear, we’ll then select “Extensions”. We’ll then be taken to our collection of extensions where we’ll select the free Google Drive integration to be added.

    Google Drive integration screenshot 1

    When you select the Drive, you’ll see an overview of what it looks like while in use within Legalboards. From here, we’re going to select the “Install Now” button to add the Drive to our account.

    A confirmation pop-up will appear to make sure that we want to add the Drive to our account and once we’ve confirmed, we’ll need to authorize Google Drive. This is very simple, we’re just going to select the Google Account we want to connect and sign in. From here, we’ll see what Legalboards can access in your drive (i.e. see, edit, create, and delete files within the Drive, view pictures, etc.).

    After allowing Legalboards to access our Google Drive, the plug-in will be installed. From this screen showing the successful installation, we’ll go to our boards.

    What Does the Integration Looks Like Within Legalboards?

    Now that the Drive has been successfully added, we’ll take a look at how it works within Legalboards. We’ll click on a card (matter) and an overview of that card will appear. From the card’s sub-menu, we’ll select the “Documents” option to see any associated files with the matter.

    In our example, we have three associated files with the card. This screen tells us the name of those files, where they came from (i.e. Clio in our example), the date they were created, and allows us to delete files. We also can use the “Upload Now” button to upload new files- which we’ll do now.

    In the sub-menu that will appear we can now select “Google Drive” as a source and select which files from the Drive we want then save. Now we can see four files- three from Clio and one from Google Drive.

    What Does This Look Like Within Google Drive?

    So we know what the integration will look like within Legalboards, but what about in our Drive? As seen below, a folder called “LegalboardsDocuments” will have a sub-folder called “Matters”. When we select this, folders for associated matters will be created with the same name they have in Legalboards.

    Within that matter’s folder, the associated files they are connected to will be in the Drive and will be updated to reflect any changes made in Legalboards.

    Didn’t find what you needed? Check out our support portalcontact our team, or check out our other resources for help using Legalboards.

  • Checklists vs. Tasks

    Checklists vs. Tasks

    We know that checklists and tasks can be similar, especially depending on what needs to be done. Usually, checklists are comprised of a list of smaller tasks that need to be completed or reminders for upcoming tasks.

    “The Checklist Manifesto” by Atul Gawande helps to differentiate checklists and tasks by taking a look at how professionals would organize their workflows. The book primarily focuses on the medical field to explain how tasks have gotten more and more difficult.

    Complex tasks aren’t only present in a single industry. We know that for the legal industry, this is especially true. At Legalboards, we’ve developed a system to help keep track of matters by breaking them down (check out this article for more information about how to do this).

    What Is The Difference?

    So, what is the difference? Checklists hold the “less important” tasks and are more for reminders. That’s not to say that checklists can’t hold important tasks, but it is more about separating a specific task into smaller phases.

    Another key difference is that tasks have deadlines attached to them and a checklist usually does not have a timeline attached.

    For example, a very common task we all usually complete is grocery shopping. Where that is the task, the items you need to purchase would be the checklist.

    In this very simple example, a task is broken down into a series of things that need to be done in order to complete the task. But how does this translate into the legal industry?

    Let’s look at how this would work within the legal industry and what this looks like within Legalboards. Legalboards has tasks integrated with Clio but the checklist is not normally included while using Clio.

    Examples of Checklist vs. Tasks in Legal

    Say you need to draft an agreement for a client (the task). When you put this into Legalboards, this would look to be in any one of the phases (columns) in a workflow.

    But, drafting an agreement contains more than one task. It could include a meeting with the client, drafting the agreement itself, any required research like if a compliance clause is applicable to the draft or if there needs to be a mediation clause, etc.

    For this client’s matter, we would want to have a task named “draft agreement” with a checklist including these smaller tasks. The checklist would therefore include:

    • Check compliance clause; and
    • Check the mediation clause.

    Let’s look at another example. In the first phase of a workflow, the task “File a Motion” has been created by the responsible lawyer. The task needs to be completed in 3 days. At the same time and within that same workflow, a checklist will be automatically created with the items:

    • Check documents; and
    • Open a folder in Google Drive.

    Likely, a paralegal will need to check and complete these items. The items are important but they are less important than the overall task and they do not have a deadline.

    Creating Checklists and Tasks in Legalboards

    Now that we know the difference between checklists and tasks, we can fully understand just how beneficial they are when it comes to organizing and keeping track of workflows.

    If you want to learn how to start creating checklists and automations in Legalboards, check out this article, or if you’re more visual, this video tutorial.

    Didn’t find what you needed? Check out our support portalcontact our team, or check out our other resources for help using Legalboards.

  • Organization and Making Finances Easier for Law Practices

    Organization and Making Finances Easier for Law Practices

    Billing can be tough- whether it’s client-facing or internal, there are various challenges practices face. Organization throughout the process is important to stay on top of cases at various points. At Legalboards, we’ve teamed up with LawPay to make this process easier than ever.  

    Organizational Tips to Make Finances Easier For Practices

    Join our panelists Jordan Turk from LawPay and Flavia Borges from Legalboards to discuss how to stay organized and keep on top of your practice’s finances. They’ll be addressing billing models, how to streamline the billing process, and how to combat the challenges that lawyers face related to their finances.

    Meet The Speaker: Jordan From LawPay

    Jordan Turk is a Legal Content & Compliance Manager at LawPay, and a practicing attorney in Texas. She earned a B.A. from the University of Texas, and a law degree from the University of Arkansas School of Law. Prior to LawPay, Jordan worked with a high-asset family law firm in Houston, Texas.

    Make sure you’re kept up to date with what’s going on at LawPay by following them on social media (LinkedIn and Twitter).

    Meet The Speaker: Flavia From Legalboards

    Flavia Borges is a lawyer, legal consultant, and legal entrepreneur with over 16 years of experience in civil law. She also is our COO at Legalboards. She specializes in the areas of consumer protection, digital law, and privacy & data protection for international clients.

    Connect with Flavia on LinkedIn or follow her on Twitter for more updates.

    Watch The Webinar On Demand

    Get Started With Legalboards and LawPay

    LawPay is one of our integration partners here at Legalboards. You can learn more about the LawPay integration here.

    Looking for more information about legal billing? Check out LawPay’s resources for more.

  • Custom Task Statuses

    Custom Task Statuses

    In this guide we’ll walk you through how to set up and use our unique feature of custom task statuses. Not all tasks look or can be classified the same. Administrative, consultative, and billing all require different steps, so why shouldn’t that be reflected in their statuses?

    Out of wanting to address this discrepancy, we’ve developed a way to assign different statuses based on the task type within Legalboards. Now you can give as many custom task statuses and task types you need for your work.

    If you’re more of a visual learner, check out our video guide below, or on YouTube. If you need more explanation on how to get started within Legalboards, check out our support portal for more help.

    Creating Custom Statuses by Type of Task

    In Legalboards find the icon on the left side of the screen titled “tasks” and select it. This will pull up tasks by their type where columns represent the different task statuses. In our example, we have the task types of general and external, but we can also choose to view all tasks by toggling the board title.

    You can see for our example’s general tasks have the statuses of to-do, in progress, waiting, and done. Compare that to the external task board where the task statuses are waiting, review, adjust, and complete. Regardless of which task type you view, you’ll be able to easily see your tasks and their status.

    Let’s hover over the task title until the sub-menu appears. From there, click on the “config tasks” button, as seen below.

    Parameters Menu: Creating a New Task Type and Changing Status

    By clicking the config tasks button, you’ll be taken to the parameters section of account settings. Within parameters, you can create new task types and customize certain fields.

    To create our new task status, click on the new item button where a sub-menu called “new parameter” will appear. In this menu let’s name the new task type “billing”. When you go the billing task board, the default statuses are to-do, doing, and done.

    While that can be sufficient, giving tasks specific statuses helps to stay organized and keep matters on track. Using statuses that truly reflect the tasks they are associated with helps you to visualize the work being done and keeps you and your team informed.

    So, let’s change those statuses to reflect the example billing process. Let’s use invoice, sent to client, and approved instead of to-do, doing and done.

    Changing Tasks Within a Board

    If you want to change your task type and the status associated with it, go to any board and click on a card. From there, the card information will be brought up where you’ll select the task section, where you can create a new task or edit an existing one.

    Now you’ll be able to change the task type or specify more information about that card. In the “type” section, select the task type associated with the card. In the example, our person belongs within the billing task type so we selected “billing”.

    Once you have specified a task type, you can now specify a task status. In our example, we’re going to assign this card the status of “invoice” and then hit save to complete this task customization.

    Didn’t find what you needed? Check out our support portal, contact our team, or check out our other resources for help using Legalboards.

  • Automation Action: Checklist Creation

    Automation Action: Checklist Creation

    In this guide, we’ll walk you through setting up our newest automation action: Checklist Creation. This automation will allow you to automate your task checklists. By setting this automation, you and your firm will be able to save time and become more efficient.

    If you’re more of a visual learner, check out our video guide below for the step-by-step process.

    https://youtube.com/watch?v=Z-Rury1LlG4%3Fcontrols%3D1%26rel%3D0%26playsinline%3D0%26cc_load_policy%3D0%26autoplay%3D0%26enablejsapi%3D1%26origin%3Dhttps%253A%252F%252Flegalboards.com%26widgetid%3D1%26forigin%3Dhttps%253A%252F%252Flegalboards.com%252Fresources%252Fautomations%252Fautomation-action-checklist-creation%252F%26aoriginsup%3D1%26vf%3D1

    The first step to automating a board is to choose which board is most appropriate and click on the “Automations for this board” icon. Overall, automations follow the same three steps of when, filter, and automate.

    Creating the checklist creation automation will have the common steps of when and filter but the last step is to set up the checklist items.

    Step 1: When

    When the sub-menu appears, click on the “Create Checklist” category and the button “New Automation”. As with any automation in Legalboards, you’ll need to define your when or trigger action, which you can find more about triggers here.

    Try to think of when the checklist creation is most appropriate for a task. You can specify the checklist creation automation to be triggered from a card movement, be time-based, or if you’ve integrated Clio into your account, based off a Clio task update.

    Trigger Actions

    The first type of trigger is card movement. If you choose this trigger, you’ll need to specify some categories which are covered in our card movement guide. Please note the categories of “drag from” and “dropping to” do not both need to completed, but at least one does need to be specified.

    In our example, let’s specify the dropping to movement to be any card moving to the client intake column.

    Step 2: Filter

    In this section, we will need to assign any necessary labels as well as card types that should be associated with this automation.

    In our example, we’re looking to create a checklist for client intake, so we will not specify any card types. This will mean any card entering the client intake column will trigger the same response.

    Step 3: Create Checklist Items

    From here, we just need to create the items for our checklist. We want to try and create a list of tasks that would cover the majority of actions needed.

    In our example, let’s cover some basic tasks associated with a client intake. We’ll make our checklist consist of “open the client file”, “create the NDA model”, “start the initial billing”, and “create the draft contract”.

    Once you’ve created your list items, be sure to hit the save button in order to complete the automation creation. Now when you click on the card, you can see the checklist items and will be able to check off the items as they are completed.

    If you need more help check out our support portal or YouTube channel for more video guides.

  • Best Practices for Legal Billing and Getting Paid

    Best Practices for Legal Billing and Getting Paid

    One of the most important components of running a legal practice is managing billing and getting payments. Many lawyers, however, find accounting, cash flow management and bill reconciliation difficult due to constraints in time and bandwidth.

    Join CPN Legal co-founder, Peggy Gruenke, in this webinar where she’ll discuss best practices to improve billing processes and cash flow for legal practices.

    This webinar will provide insights into:

    • Technology and facilitating a smooth billing cycle
    • Retainer management
    • Tech tips and tools to bill time efficiently
    • The economics of flat fee billing, invoicing and payments
    • Creating and adhering to a billing schedule
    • Billing metrics and what data to focus on

    Peggy Gruenke is the co-founder of CPN Legal. She is a nationally sought after speaker on legal technology and law firm operations. She has over 20 years experience in the legal industry and prior to working with lawyers, she developed integral technology proficiencies as an IT consultant for small businesses.

    Watch The Webinar

    You can watch this on-demand webinar below or directly on YouTube.

    Want To Learn More?

    Check out the CPN Blog for more dedicated posts about legal billing.

  • Automation Action: Send Email

    Automation Action: Send Email

    Create unique email notifications personalized to your team, clients, or external consultants by setting up email automation in Legalboards.

    By creating “Send Email” automations, you can go beyond a simple template email notification. However, templates can still appear as spam in some inboxes- which is a problem we want to help you with.

    Legalboards deals with your workflows, and as such, all of your tasks and contact information is integrated within the system. As a result, you can use the “Send Email” action in combination with triggers like card movement, pending time, or task update status and filters to create fully customized automation that’s appropriate for your tasks.

    If you’re unsure of how automation works or what benefits it could provide, check out this article.

    Getting Started

    Now we’ll walk you through creating a “Send Email” automation. First, within Legalboards, find at the top right of your board page an icon called “Automations for this Board”. Click on that icon and choose the action “send email”.

    You’ll need to configure your trigger (or when an automation will happen) and filter for your automation. From there, you can specify the sender and the receiver of the email as well as writing the content.

    Let’s take look at how the fields related to the sender and receiver work:

    • From: In this field, you will need to configure who is the sender of this email as well as what happens with any replies.
    • To: This is the most crucial field, and you have several options. Let’s examine them one by one.

    Specifying Your Fields

    We’ll start by looking at the “To” field. The options for this field are:

    • Matter’s responsible attorney: The email will be sent only to the matter cards, which have a responsible attorney and an email filled in.
    • Matter’s originating attorney: The email will be sent only to the matters cards, which have an originating attorney and an email filled in.
    • Client’s email: If the matters or contact card has an associated client email, this email will be sent to the client.
    • Card`s members: The email will be sent to anyone who is a member of this card.

    However, you are not limited to just one of these options for the “To” field. Multiple options can be chosen in order to customize this process for your specific needs.

    Next, we’ll specify the “From” field where you’ll have the option to specify who will be receiving this email. You only have to choose one of your team members in any role- admin, members, or viewers.

    You can see this in action in the video below;

    Finally, you can customize the message that will be sent. You can specify the subject and content you want so you can send specific messages.

    Email Automation in Action

    Now that you know how to create an automation for the Send Email action, let’s look at some examples of the action in use:

    1. General Workflow
      When a divorce matter arrives in the “Approval” column, an email will be sent to the client explaining the next steps on the divorce case workflow.
    2. Accounting
      When a card stays more than 15 days in the “Billing” column, an email will be sent to the members of this card to alert them of case status.
    3. Immigration
      When a card in the “Registration Form (Preparation)” column has a “Letter Preparation” task completed, an email will be sent to the responsible attorney.

    If you still need more help check out our support portal for more resources or find more video guides here.

  • Automation Trigger: Card Movement

    Automation Trigger: Card Movement

    In this guide, we’ll walk you through how to set up a card movement automation trigger for increased productivity. This means that when a card moves columns, a trigger will be set and have an automated response.

    Card movement automation triggers are easy to set up for daily use. By creating this trigger, you will see a significant change in how you manage your workflow.

    Getting Started

    In Legalboards, you can automate three types of actions (task creation, send email, and move card).

    When you create an action with the card movement trigger, you create almost a supervisor for the board and its columns. The Legalboards system will monitor what happens in these columns and either manually or automatically, will activate the action you set up in this automation.

    Automations are created in three steps: when, filter, and automate. Let’s take a look at the first and most important step in a little bit more detail. If you’re more of a visual learner also check out the video below.

    Step 1: When

    In Legalboards you can create automations for three different actions- move card, send email or task creation. When you create a new automation for those actions, you have a choice of what kind of trigger is best for you. If you need any help with your decision, check out this guide.

    If you chose the card movement trigger as the most appropriate time for an automation to occur, you’ll then need to think about columns. The amount of columns can depend on your matter but you’ll have to specify which columns are related. These columns should represent the movement that you want the card to do automatically.

    Types of Movement

    The two types of card movement that need to be specified are “drag from” and “dropping to”;

    • Drag from addresses what column the card belongs to before any movement. This selection is not mandatory, so if you decide to not select a column, “all columns” will be the default. That means no matter which column the card belonged to before movement, the action will only consider the new column for this card.

    Please note that if you don’t determine a column to “drag from”, you must now specify a column in the “dropping to” field.

    • Dropping to addresses what column a card is moving to. You’ll need to choose either a specific column or you can select “all columns”. If you decide to select “all columns, it means that regardless of which column this card will drop to, only the column it belonged to before matters.

    Also note that when you don’t determine a column for the “dropping to” field, you must now specify a column in the “drag from” field.

    What’s Next?

    Hopefully, this has been easier than you may have thought. The process is fairly simple- you only need to specify one of two fields (“drag from” or “dropping to”) to start creating a new automation with the card movement trigger.

    With that card movement trigger set up for the automation, you only need to set up the filter and automate to complete the action.

    The use of the card movement trigger isn’t limited to only manual movements of cards. You can also combine this trigger with the “move card” action. Now, you won’t need to move cards one by one across the columns, you can create a chain of automation.

    “Card Movement” in Action

    To illustrate some of the capabilities of the card movement trigger, here are some example uses:

    Divorce Board:
    When cards from the column “Property Settlement Agreement” move to the next column called “File for master”, a new task named “Review Draft” is created.

    Immigration Board:
    When cards from “All Columns” move to the column called “Engagement Letter & PP”, a new task named “Create Draft Letter” is created.

    General Workflow Board:
    When a card moves to the “Billing” column, the same card will be created in a new board called “Accounting”. This cloned card will then be placed on the column named “Waiting for approval”.

    Still Need Some Help?

    If you still have any questions, check out our support portal or request a demo to contact our team.

  • Working in Legalboards- Automation Action: Task Creation

    Working in Legalboards- Automation Action: Task Creation

    An important part of a team leader’s role is to distribute and organize team members. A team leader has to address who’s doing what, when tasks need to be completed, and how to best complete the task. However, this doesn’t need to require a big time commitment when you use Legalboards for task automation. In this guide you’ll find help with creating tasks and how to start using task automations.

    How to Create Task Automation in Legalboards

    You’ll see at the top right of your board page an icon called “Automations for this board”. Click on the icon and choose the action: “Task Create” (or, if you use Clio integration- Task Clio Create) to create a new automation. To see this in action, check out the video below for an example using a divorce board. Task automations can be created in three simple steps:
    1. Select and set up the automation trigger;
    2. Filter which type of cards you want to automate; and
    3. Configure the “who, what, and when” details of your tasks.
    The final step is usually the most difficult one because of the number of fields that need to be completed. So, let’s look at the types of fields in more detail.

    Types of Task Fields

    Let’s take a look at each field we have in the automation process. We’ll start with the “Assignee” field which has several options to choose from:
    • Matter’s Responsible Attorney: the task will be assigned only to the Matter Cards, which have a Responsible Attorney filled.
    • Matter’s Originating Attorney: the task will be assigned only to the Matters Cards, which have an Originating Attorney filled in.
    • Matter’s Client: If this card has a client in Clio Portal, this task will be assigned to this person. Please note that this option is also only available for accounts integrated with Clio.
    • Card’s Members: the task will be assigned to anyone who is a member of this card.
    You also have the option to specify who will be the fixed assignee for this task. You only have to choose one of your team members in any role- Admin, Members, or Viewers. In this “Assignee” field, you can also choose how many options you need, giving you the flexibility to build tasks tailored to your needs. Legalboards will verify which team members are the most able to complete the task for the due date. The task will then be assigned to that person within the platform. Next, we have the “Due In” field. This field focuses on the number of days after the trigger is actioned and if the task still needs to be completed. Finally, you can personalize the title and the description so the task can have detail about how the work needs to be done. Once this is complete, you’ve fully set up automated task creation! Now, team leaders can let Legalboards deal with allocating tasks through automation.

    Specific Examples of Applications

    If a more specific example of task creation helps, here are some examples of task automation in different boards:
    • Account: when a new card arrives on the column “Waiting for Approval,” a task will be created for an invoice to be inputted into the billing system. Another task will be created for “Matter’s Responsible” in order to contact the client regarding payment dates. This helps to stay on top of billing and client matters.
    • General Workflow– when a card stays more than 15 days in the column “Waiting,” a task will be created to “Matter’s Originating Attorney”. This helps to analyze time allocation through inspecting the overspent time for this matter.
    • Divorce– when a “Draft Agreement” task is completed within a card on the column “Property Settlement Agreement,” another task will be created for one “Card Member” to review this agreement. This provides team members with updates on the matter and tasks associated.

    Still Need Help?

    Didn’t find what you needed? Learn more about automation in Legalboards here, check out more videos, or visit our support portal for more help with creating automations.