Category: Working in Legalboards

  • Custom Task Statuses

    Custom Task Statuses

    In this guide we’ll walk you through how to set up and use our unique feature of custom task statuses. Not all tasks look or can be classified the same. Administrative, consultative, and billing all require different steps, so why shouldn’t that be reflected in their statuses?

    Out of wanting to address this discrepancy, we’ve developed a way to assign different statuses based on the task type within Legalboards. Now you can give as many custom task statuses and task types you need for your work.

    If you’re more of a visual learner, check out our video guide below, or on YouTube. If you need more explanation on how to get started within Legalboards, check out our support portal for more help.

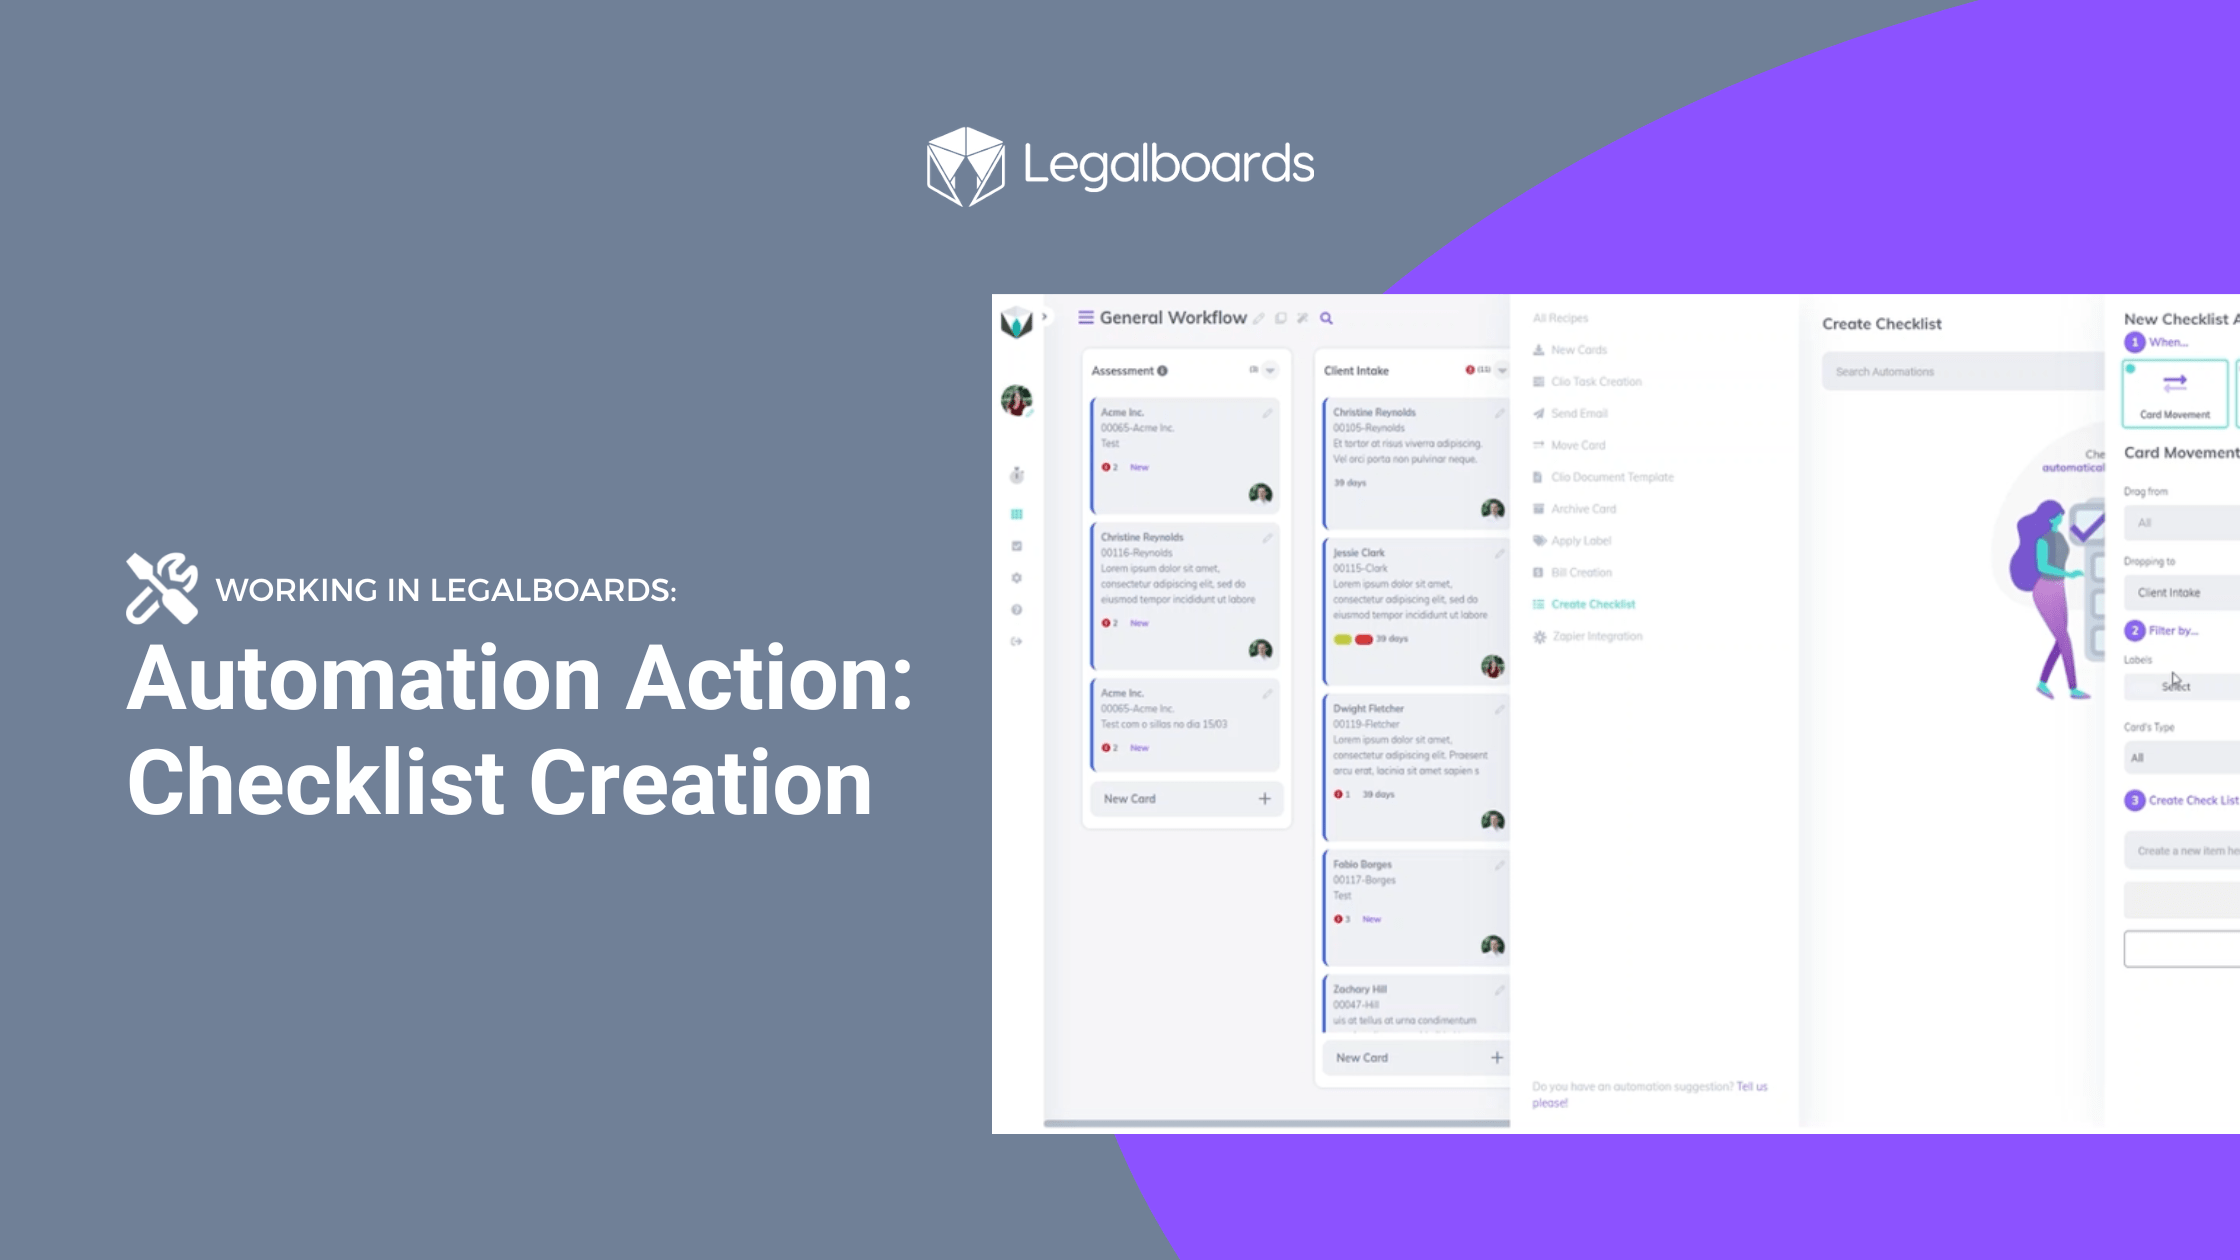
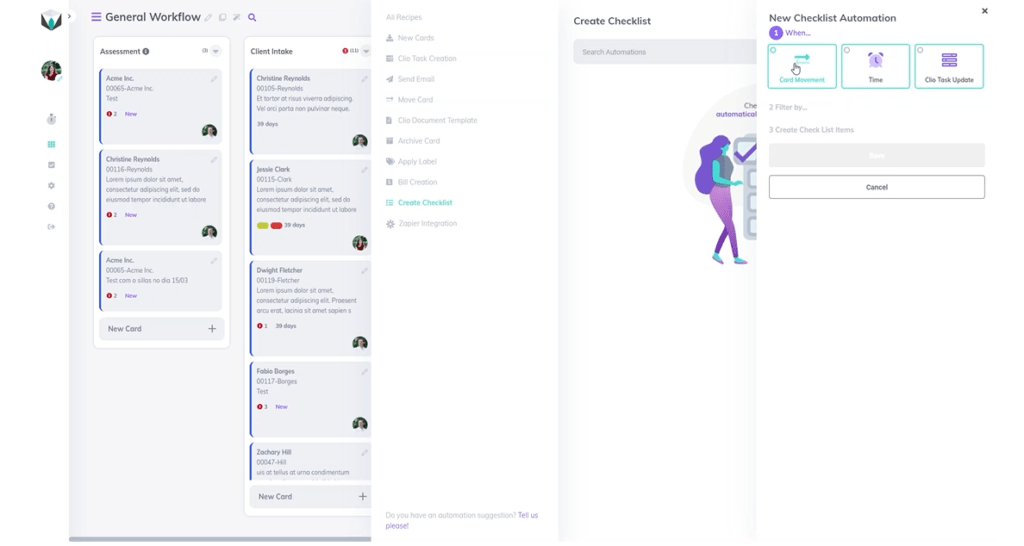
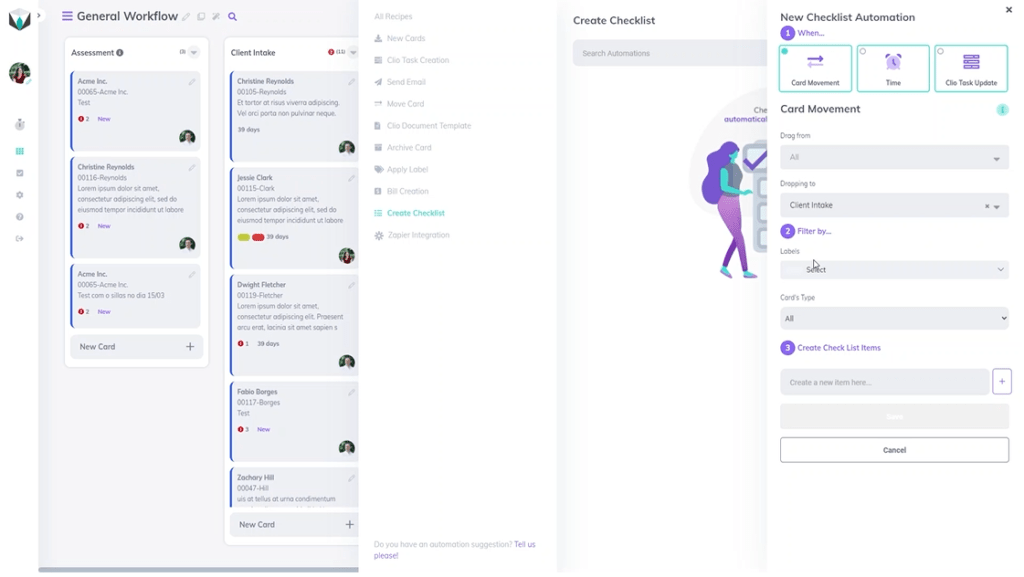
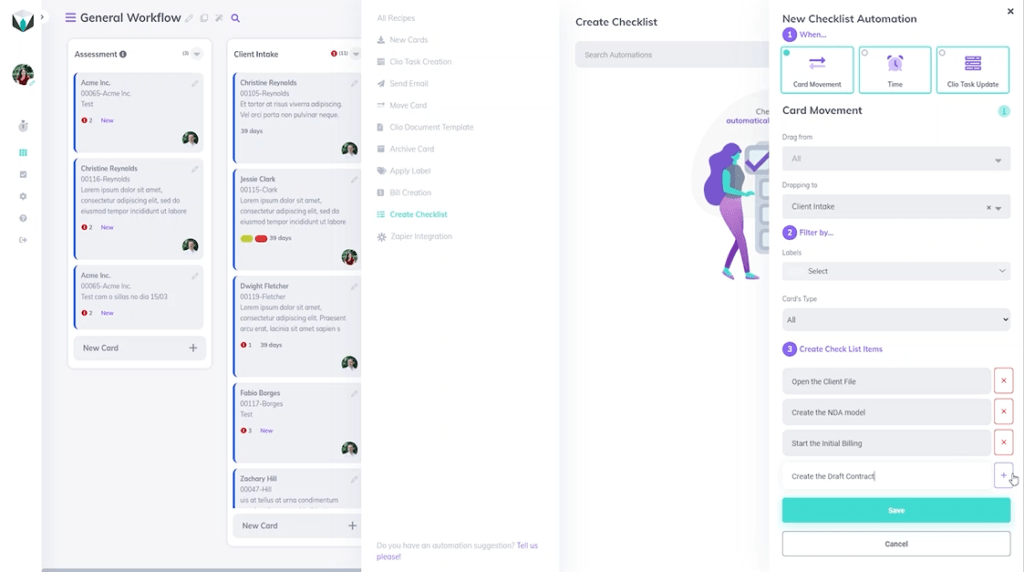
    Creating Custom Statuses by Type of Task

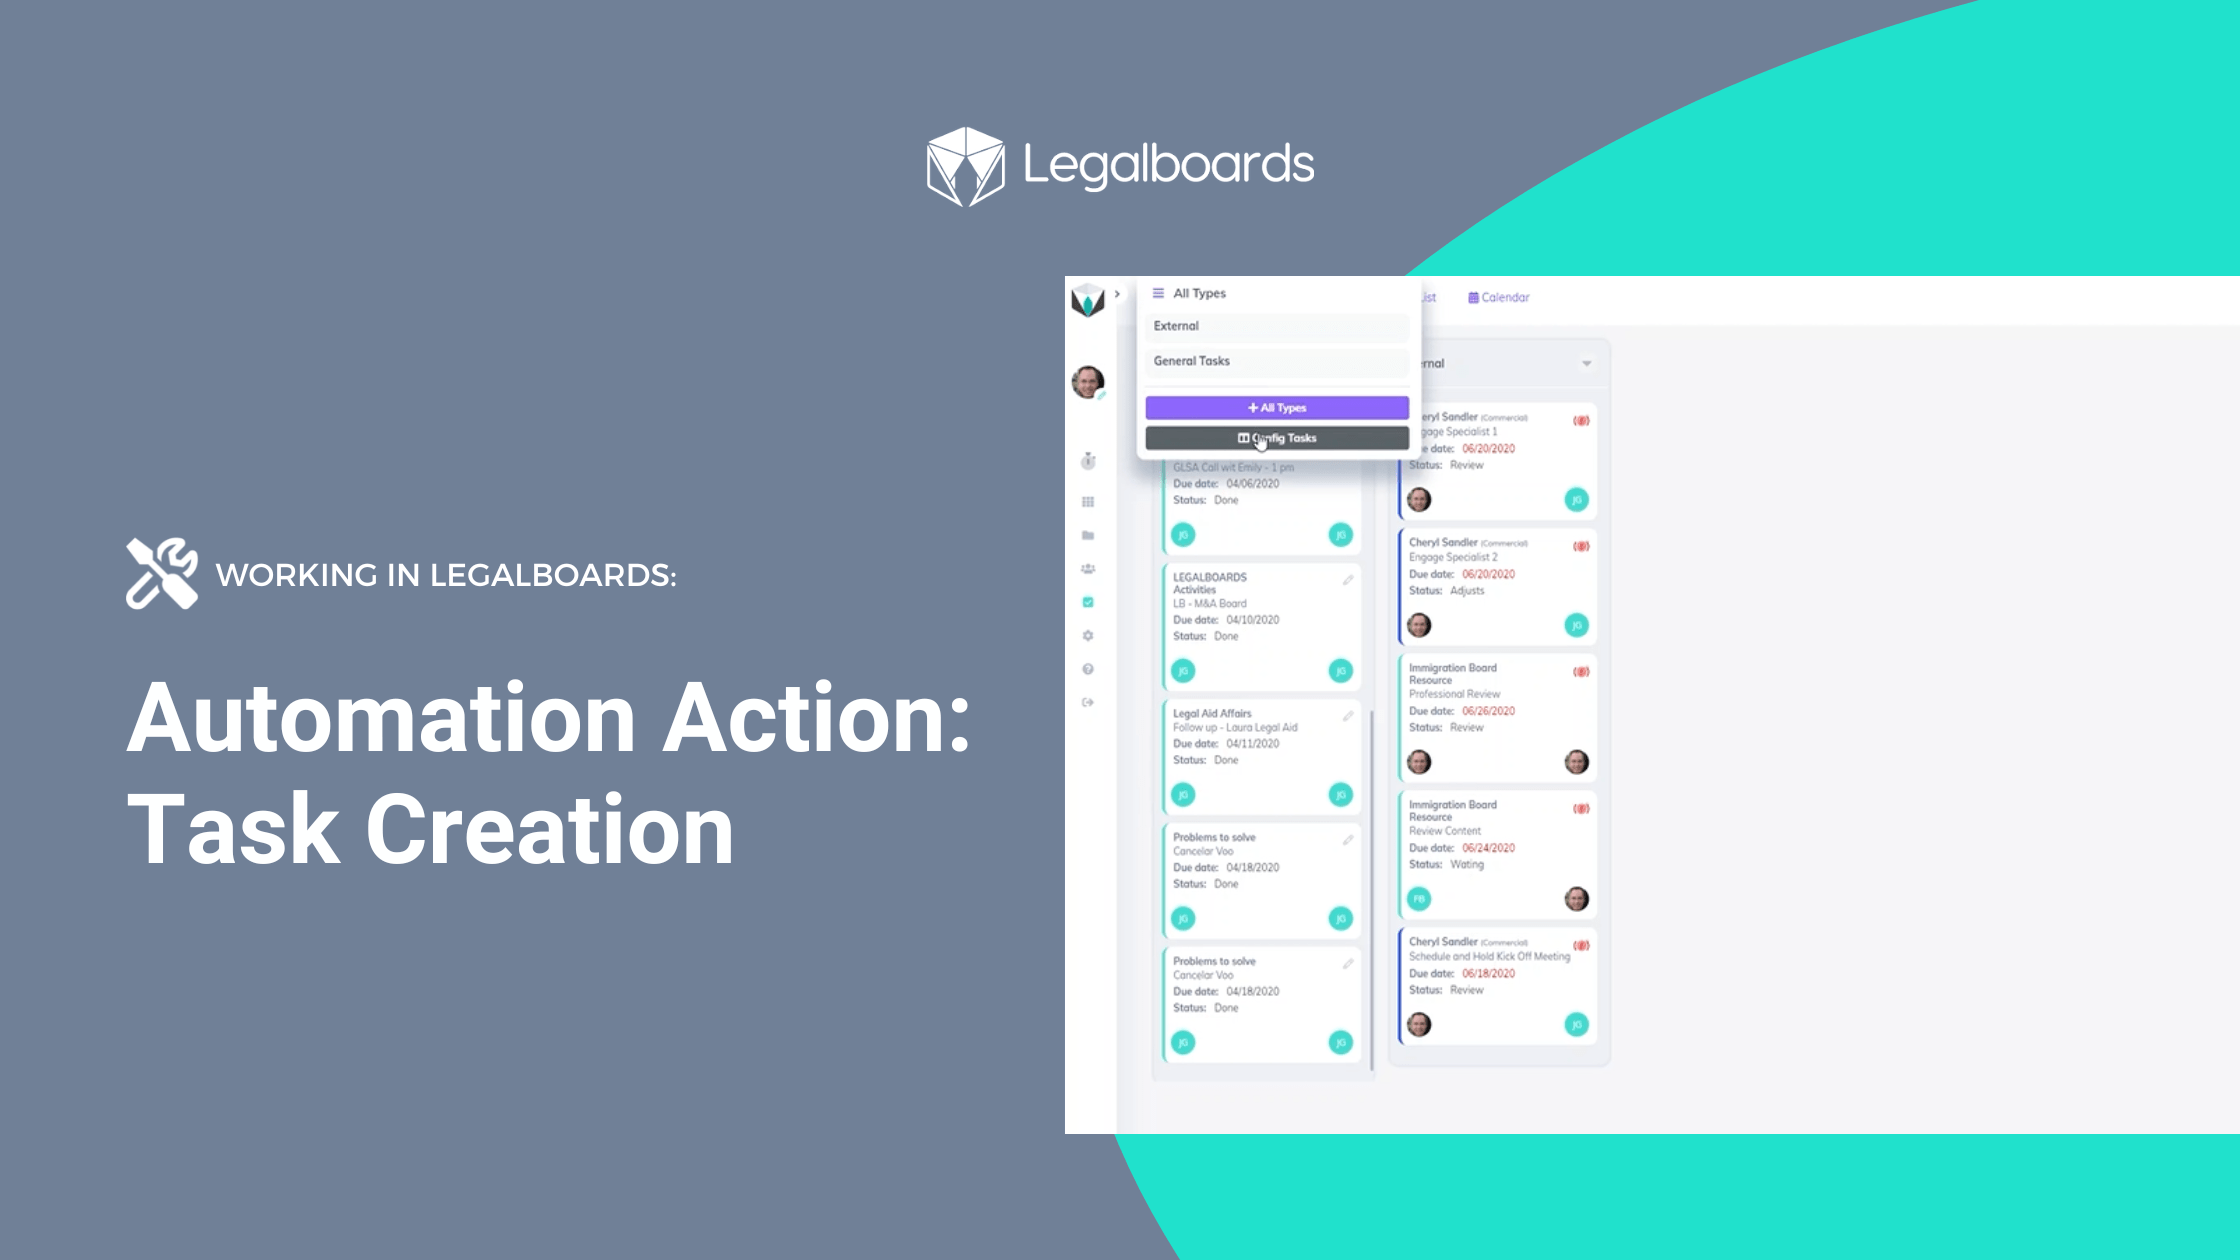
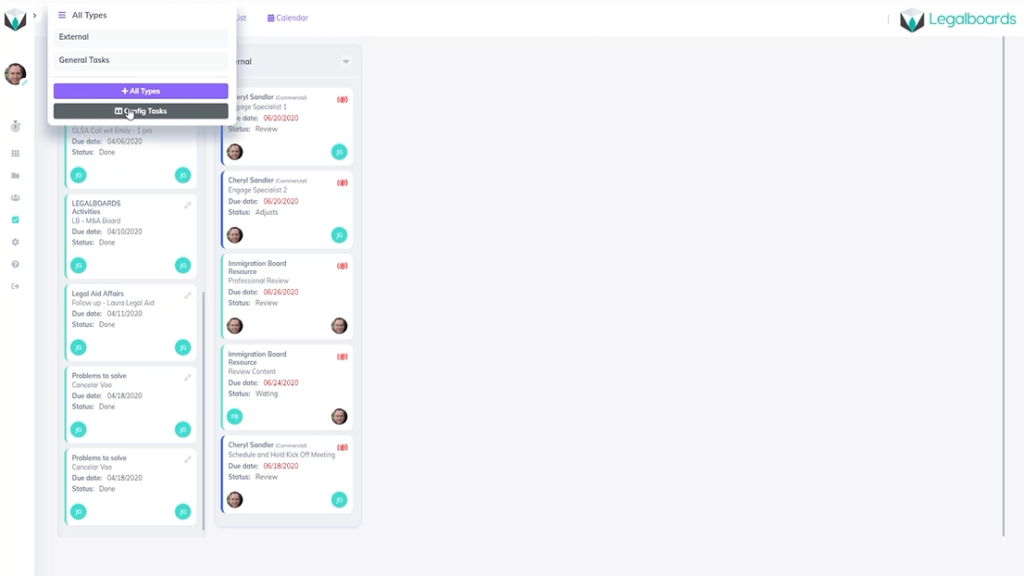
    In Legalboards find the icon on the left side of the screen titled “tasks” and select it. This will pull up tasks by their type where columns represent the different task statuses. In our example, we have the task types of general and external, but we can also choose to view all tasks by toggling the board title.

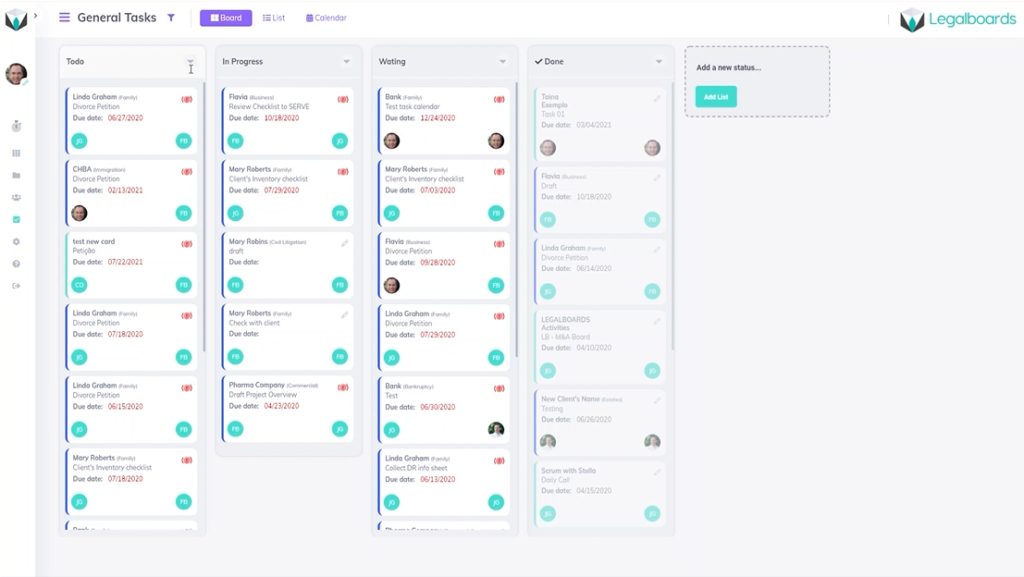
    You can see for our example’s general tasks have the statuses of to-do, in progress, waiting, and done. Compare that to the external task board where the task statuses are waiting, review, adjust, and complete. Regardless of which task type you view, you’ll be able to easily see your tasks and their status.

    Let’s hover over the task title until the sub-menu appears. From there, click on the “config tasks” button, as seen below.

    Parameters Menu: Creating a New Task Type and Changing Status

    By clicking the config tasks button, you’ll be taken to the parameters section of account settings. Within parameters, you can create new task types and customize certain fields.

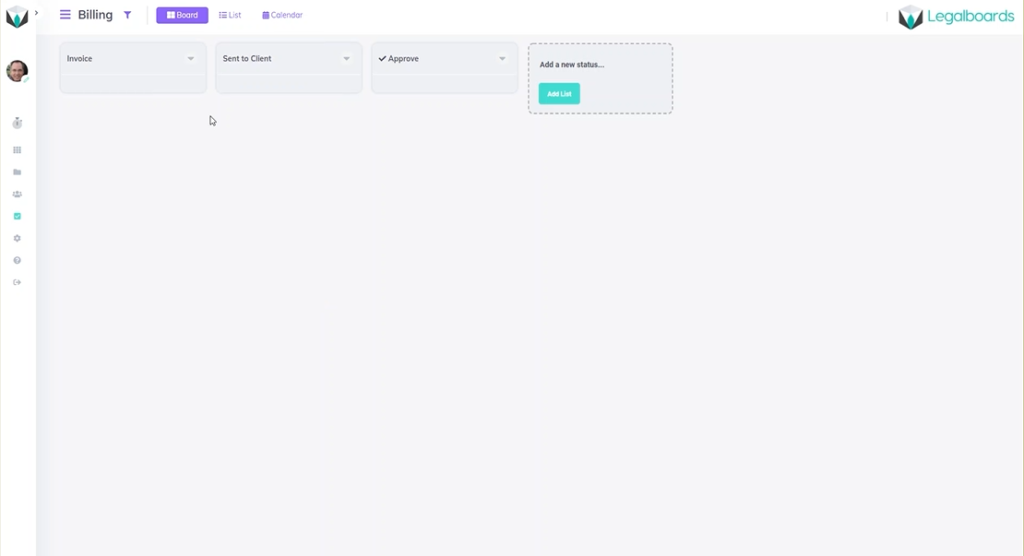
    To create our new task status, click on the new item button where a sub-menu called “new parameter” will appear. In this menu let’s name the new task type “billing”. When you go the billing task board, the default statuses are to-do, doing, and done.

    While that can be sufficient, giving tasks specific statuses helps to stay organized and keep matters on track. Using statuses that truly reflect the tasks they are associated with helps you to visualize the work being done and keeps you and your team informed.

    So, let’s change those statuses to reflect the example billing process. Let’s use invoice, sent to client, and approved instead of to-do, doing and done.

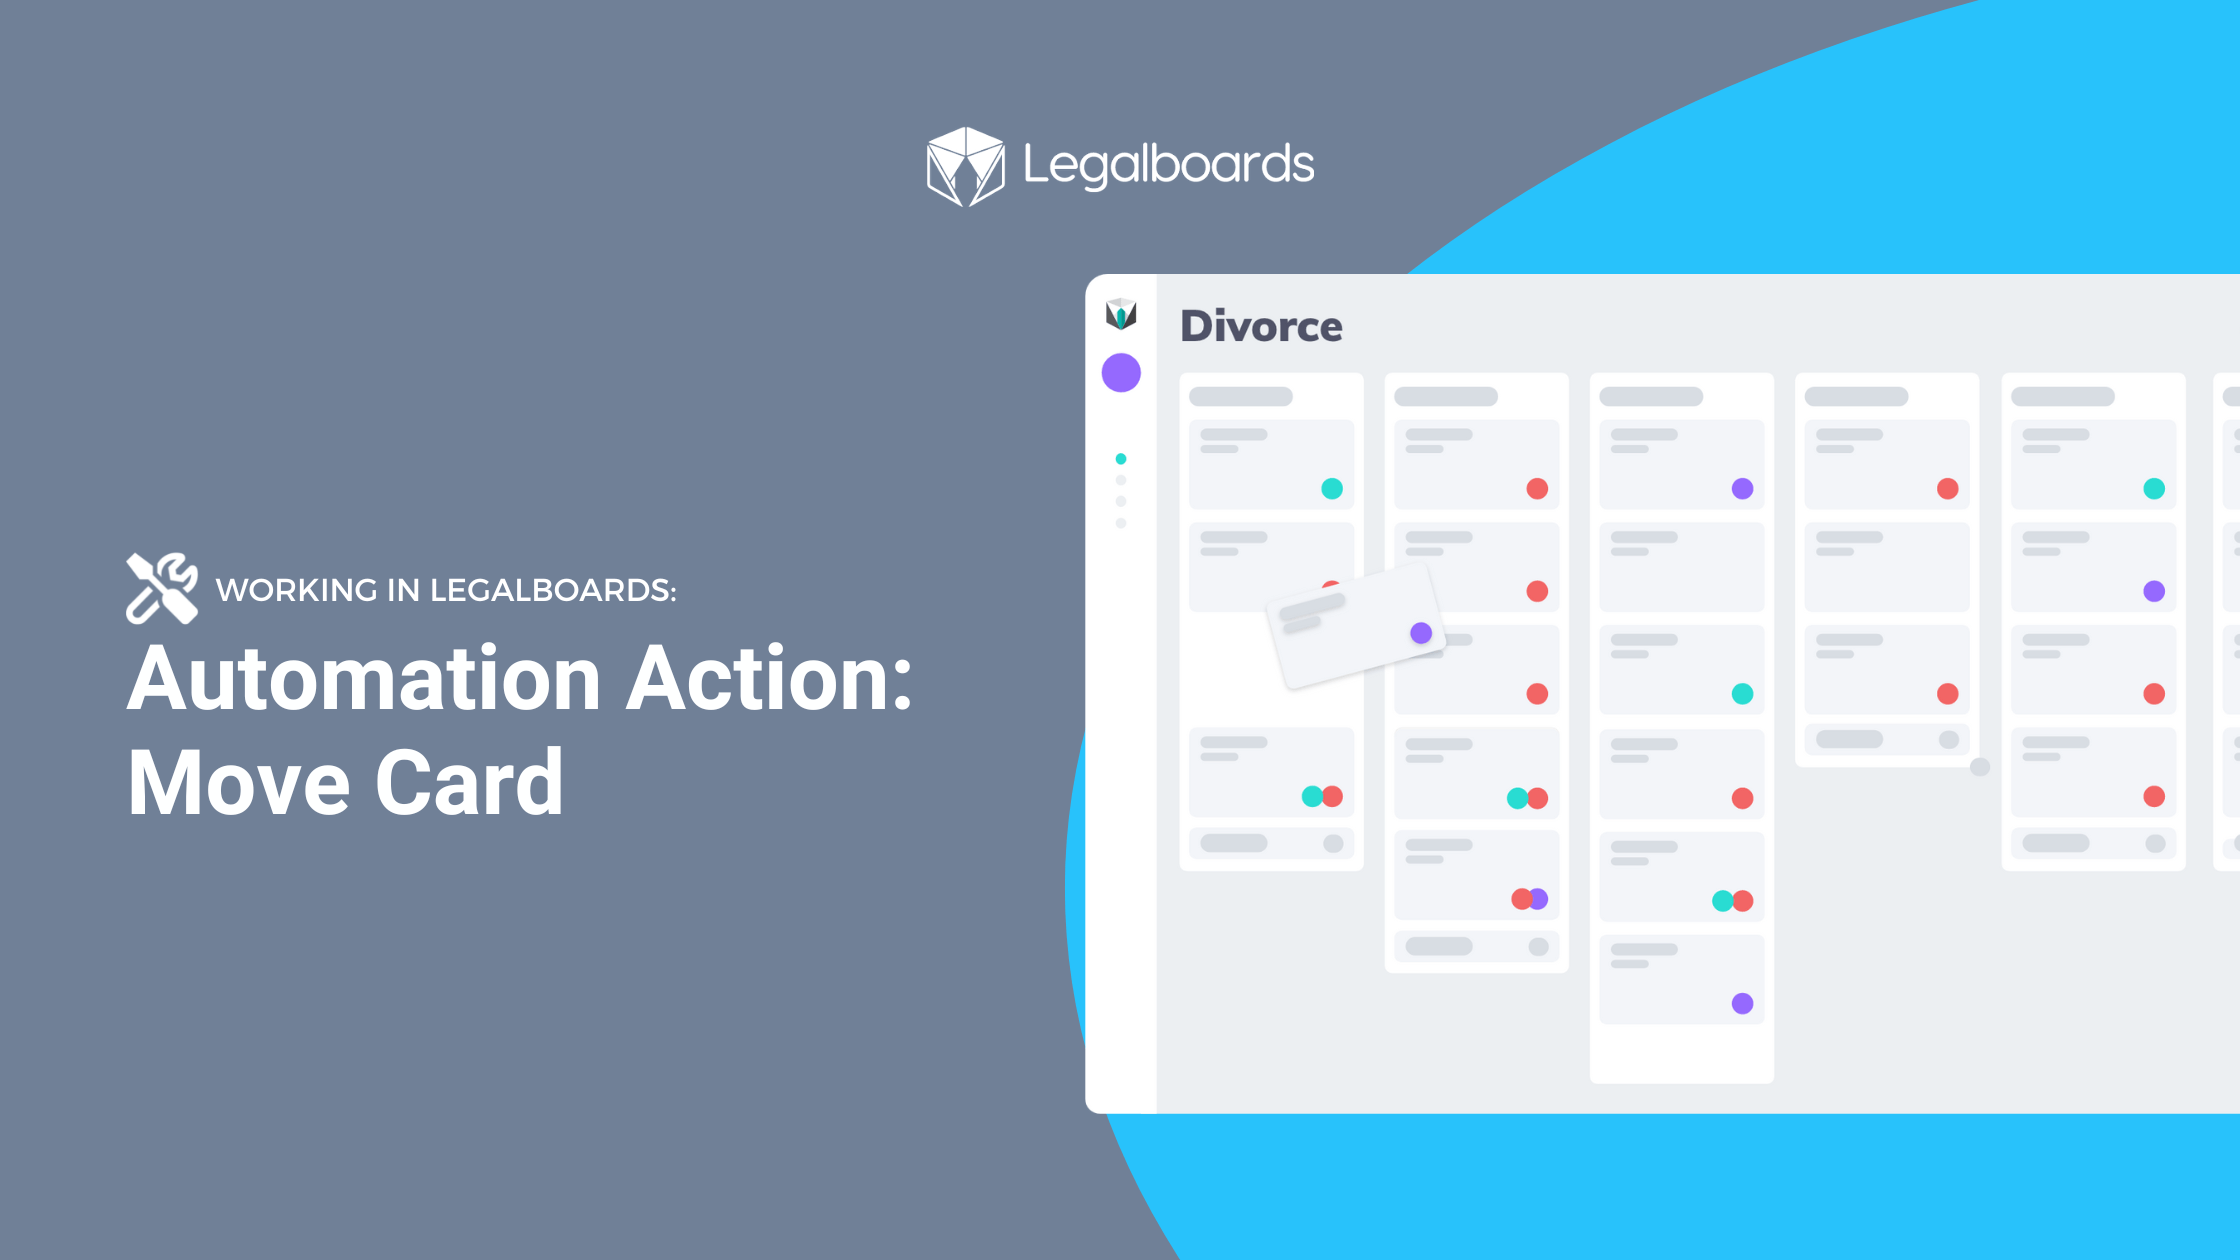
    Changing Tasks Within a Board

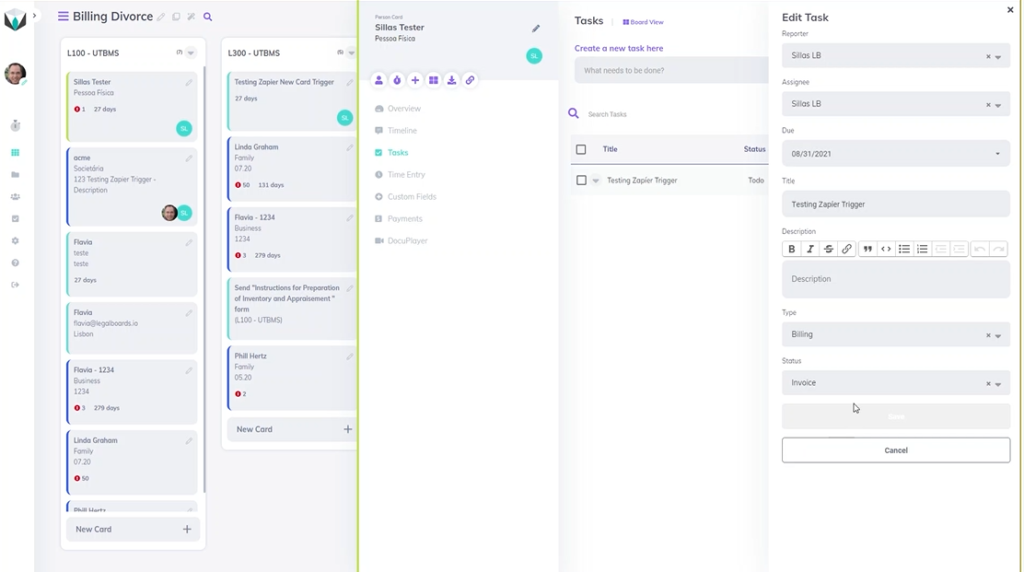
    If you want to change your task type and the status associated with it, go to any board and click on a card. From there, the card information will be brought up where you’ll select the task section, where you can create a new task or edit an existing one.

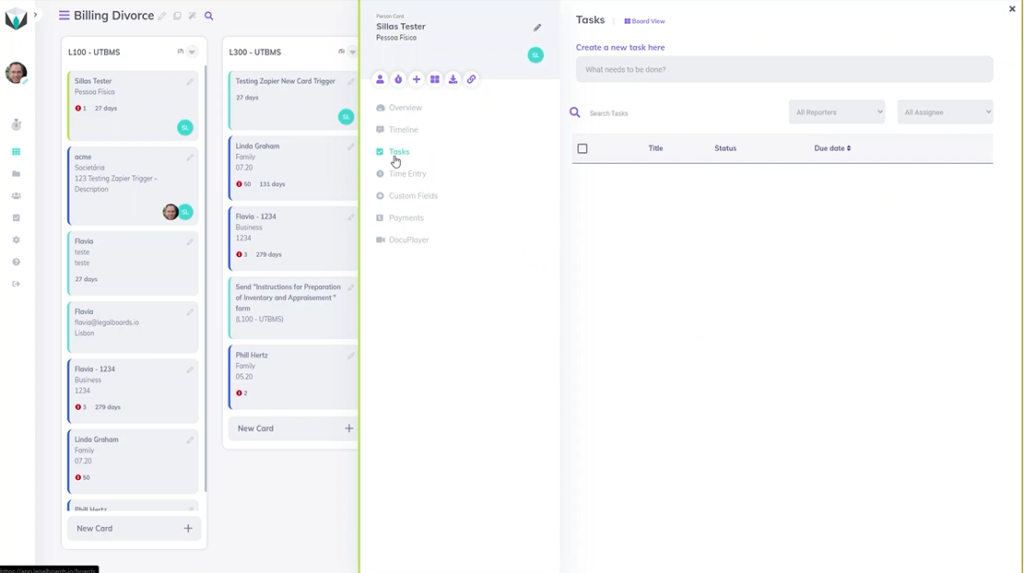
    Now you’ll be able to change the task type or specify more information about that card. In the “type” section, select the task type associated with the card. In the example, our person belongs within the billing task type so we selected “billing”.

    Once you have specified a task type, you can now specify a task status. In our example, we’re going to assign this card the status of “invoice” and then hit save to complete this task customization.

    Didn’t find what you needed? Check out our support portal, contact our team, or check out our other resources for help using Legalboards.

  • Automation Action: Checklist Creation

    Automation Action: Checklist Creation

    In this guide, we’ll walk you through setting up our newest automation action: Checklist Creation. This automation will allow you to automate your task checklists. By setting this automation, you and your firm will be able to save time and become more efficient.

    If you’re more of a visual learner, check out our video guide below for the step-by-step process.

    https://youtube.com/watch?v=Z-Rury1LlG4%3Fcontrols%3D1%26rel%3D0%26playsinline%3D0%26cc_load_policy%3D0%26autoplay%3D0%26enablejsapi%3D1%26origin%3Dhttps%253A%252F%252Flegalboards.com%26widgetid%3D1%26forigin%3Dhttps%253A%252F%252Flegalboards.com%252Fresources%252Fautomations%252Fautomation-action-checklist-creation%252F%26aoriginsup%3D1%26vf%3D1

    The first step to automating a board is to choose which board is most appropriate and click on the “Automations for this board” icon. Overall, automations follow the same three steps of when, filter, and automate.

    Creating the checklist creation automation will have the common steps of when and filter but the last step is to set up the checklist items.

    Step 1: When

    When the sub-menu appears, click on the “Create Checklist” category and the button “New Automation”. As with any automation in Legalboards, you’ll need to define your when or trigger action, which you can find more about triggers here.

    Try to think of when the checklist creation is most appropriate for a task. You can specify the checklist creation automation to be triggered from a card movement, be time-based, or if you’ve integrated Clio into your account, based off a Clio task update.

    Trigger Actions

    The first type of trigger is card movement. If you choose this trigger, you’ll need to specify some categories which are covered in our card movement guide. Please note the categories of “drag from” and “dropping to” do not both need to completed, but at least one does need to be specified.

    In our example, let’s specify the dropping to movement to be any card moving to the client intake column.

    Step 2: Filter

    In this section, we will need to assign any necessary labels as well as card types that should be associated with this automation.

    In our example, we’re looking to create a checklist for client intake, so we will not specify any card types. This will mean any card entering the client intake column will trigger the same response.

    Step 3: Create Checklist Items

    From here, we just need to create the items for our checklist. We want to try and create a list of tasks that would cover the majority of actions needed.

    In our example, let’s cover some basic tasks associated with a client intake. We’ll make our checklist consist of “open the client file”, “create the NDA model”, “start the initial billing”, and “create the draft contract”.

    Once you’ve created your list items, be sure to hit the save button in order to complete the automation creation. Now when you click on the card, you can see the checklist items and will be able to check off the items as they are completed.

    If you need more help check out our support portal or YouTube channel for more video guides.

  • Automation Action: Send Email

    Automation Action: Send Email

    Create unique email notifications personalized to your team, clients, or external consultants by setting up email automation in Legalboards.

    By creating “Send Email” automations, you can go beyond a simple template email notification. However, templates can still appear as spam in some inboxes- which is a problem we want to help you with.

    Legalboards deals with your workflows, and as such, all of your tasks and contact information is integrated within the system. As a result, you can use the “Send Email” action in combination with triggers like card movement, pending time, or task update status and filters to create fully customized automation that’s appropriate for your tasks.

    If you’re unsure of how automation works or what benefits it could provide, check out this article.

    Getting Started

    Now we’ll walk you through creating a “Send Email” automation. First, within Legalboards, find at the top right of your board page an icon called “Automations for this Board”. Click on that icon and choose the action “send email”.

    You’ll need to configure your trigger (or when an automation will happen) and filter for your automation. From there, you can specify the sender and the receiver of the email as well as writing the content.

    Let’s take look at how the fields related to the sender and receiver work:

    • From: In this field, you will need to configure who is the sender of this email as well as what happens with any replies.
    • To: This is the most crucial field, and you have several options. Let’s examine them one by one.

    Specifying Your Fields

    We’ll start by looking at the “To” field. The options for this field are:

    • Matter’s responsible attorney: The email will be sent only to the matter cards, which have a responsible attorney and an email filled in.
    • Matter’s originating attorney: The email will be sent only to the matters cards, which have an originating attorney and an email filled in.
    • Client’s email: If the matters or contact card has an associated client email, this email will be sent to the client.
    • Card`s members: The email will be sent to anyone who is a member of this card.

    However, you are not limited to just one of these options for the “To” field. Multiple options can be chosen in order to customize this process for your specific needs.

    Next, we’ll specify the “From” field where you’ll have the option to specify who will be receiving this email. You only have to choose one of your team members in any role- admin, members, or viewers.

    You can see this in action in the video below;

    Finally, you can customize the message that will be sent. You can specify the subject and content you want so you can send specific messages.

    Email Automation in Action

    Now that you know how to create an automation for the Send Email action, let’s look at some examples of the action in use:

    1. General Workflow
      When a divorce matter arrives in the “Approval” column, an email will be sent to the client explaining the next steps on the divorce case workflow.
    2. Accounting
      When a card stays more than 15 days in the “Billing” column, an email will be sent to the members of this card to alert them of case status.
    3. Immigration
      When a card in the “Registration Form (Preparation)” column has a “Letter Preparation” task completed, an email will be sent to the responsible attorney.

    If you still need more help check out our support portal for more resources or find more video guides here.

  • Automation Trigger: Card Movement

    Automation Trigger: Card Movement

    In this guide, we’ll walk you through how to set up a card movement automation trigger for increased productivity. This means that when a card moves columns, a trigger will be set and have an automated response.

    Card movement automation triggers are easy to set up for daily use. By creating this trigger, you will see a significant change in how you manage your workflow.

    Getting Started

    In Legalboards, you can automate three types of actions (task creation, send email, and move card).

    When you create an action with the card movement trigger, you create almost a supervisor for the board and its columns. The Legalboards system will monitor what happens in these columns and either manually or automatically, will activate the action you set up in this automation.

    Automations are created in three steps: when, filter, and automate. Let’s take a look at the first and most important step in a little bit more detail. If you’re more of a visual learner also check out the video below.

    Step 1: When

    In Legalboards you can create automations for three different actions- move card, send email or task creation. When you create a new automation for those actions, you have a choice of what kind of trigger is best for you. If you need any help with your decision, check out this guide.

    If you chose the card movement trigger as the most appropriate time for an automation to occur, you’ll then need to think about columns. The amount of columns can depend on your matter but you’ll have to specify which columns are related. These columns should represent the movement that you want the card to do automatically.

    Types of Movement

    The two types of card movement that need to be specified are “drag from” and “dropping to”;

    • Drag from addresses what column the card belongs to before any movement. This selection is not mandatory, so if you decide to not select a column, “all columns” will be the default. That means no matter which column the card belonged to before movement, the action will only consider the new column for this card.

    Please note that if you don’t determine a column to “drag from”, you must now specify a column in the “dropping to” field.

    • Dropping to addresses what column a card is moving to. You’ll need to choose either a specific column or you can select “all columns”. If you decide to select “all columns, it means that regardless of which column this card will drop to, only the column it belonged to before matters.

    Also note that when you don’t determine a column for the “dropping to” field, you must now specify a column in the “drag from” field.

    What’s Next?

    Hopefully, this has been easier than you may have thought. The process is fairly simple- you only need to specify one of two fields (“drag from” or “dropping to”) to start creating a new automation with the card movement trigger.

    With that card movement trigger set up for the automation, you only need to set up the filter and automate to complete the action.

    The use of the card movement trigger isn’t limited to only manual movements of cards. You can also combine this trigger with the “move card” action. Now, you won’t need to move cards one by one across the columns, you can create a chain of automation.

    “Card Movement” in Action

    To illustrate some of the capabilities of the card movement trigger, here are some example uses:

    Divorce Board:
    When cards from the column “Property Settlement Agreement” move to the next column called “File for master”, a new task named “Review Draft” is created.

    Immigration Board:
    When cards from “All Columns” move to the column called “Engagement Letter & PP”, a new task named “Create Draft Letter” is created.

    General Workflow Board:
    When a card moves to the “Billing” column, the same card will be created in a new board called “Accounting”. This cloned card will then be placed on the column named “Waiting for approval”.

    Still Need Some Help?

    If you still have any questions, check out our support portal or request a demo to contact our team.

  • Working in Legalboards- Automation Action: Task Creation

    Working in Legalboards- Automation Action: Task Creation

    An important part of a team leader’s role is to distribute and organize team members. A team leader has to address who’s doing what, when tasks need to be completed, and how to best complete the task. However, this doesn’t need to require a big time commitment when you use Legalboards for task automation. In this guide you’ll find help with creating tasks and how to start using task automations.

    How to Create Task Automation in Legalboards

    You’ll see at the top right of your board page an icon called “Automations for this board”. Click on the icon and choose the action: “Task Create” (or, if you use Clio integration- Task Clio Create) to create a new automation. To see this in action, check out the video below for an example using a divorce board. Task automations can be created in three simple steps:
    1. Select and set up the automation trigger;
    2. Filter which type of cards you want to automate; and
    3. Configure the “who, what, and when” details of your tasks.
    The final step is usually the most difficult one because of the number of fields that need to be completed. So, let’s look at the types of fields in more detail.

    Types of Task Fields

    Let’s take a look at each field we have in the automation process. We’ll start with the “Assignee” field which has several options to choose from:
    • Matter’s Responsible Attorney: the task will be assigned only to the Matter Cards, which have a Responsible Attorney filled.
    • Matter’s Originating Attorney: the task will be assigned only to the Matters Cards, which have an Originating Attorney filled in.
    • Matter’s Client: If this card has a client in Clio Portal, this task will be assigned to this person. Please note that this option is also only available for accounts integrated with Clio.
    • Card’s Members: the task will be assigned to anyone who is a member of this card.
    You also have the option to specify who will be the fixed assignee for this task. You only have to choose one of your team members in any role- Admin, Members, or Viewers. In this “Assignee” field, you can also choose how many options you need, giving you the flexibility to build tasks tailored to your needs. Legalboards will verify which team members are the most able to complete the task for the due date. The task will then be assigned to that person within the platform. Next, we have the “Due In” field. This field focuses on the number of days after the trigger is actioned and if the task still needs to be completed. Finally, you can personalize the title and the description so the task can have detail about how the work needs to be done. Once this is complete, you’ve fully set up automated task creation! Now, team leaders can let Legalboards deal with allocating tasks through automation.

    Specific Examples of Applications

    If a more specific example of task creation helps, here are some examples of task automation in different boards:
    • Account: when a new card arrives on the column “Waiting for Approval,” a task will be created for an invoice to be inputted into the billing system. Another task will be created for “Matter’s Responsible” in order to contact the client regarding payment dates. This helps to stay on top of billing and client matters.
    • General Workflow– when a card stays more than 15 days in the column “Waiting,” a task will be created to “Matter’s Originating Attorney”. This helps to analyze time allocation through inspecting the overspent time for this matter.
    • Divorce– when a “Draft Agreement” task is completed within a card on the column “Property Settlement Agreement,” another task will be created for one “Card Member” to review this agreement. This provides team members with updates on the matter and tasks associated.

    Still Need Help?

    Didn’t find what you needed? Learn more about automation in Legalboards here, check out more videos, or visit our support portal for more help with creating automations.
  • Working in Legalboards- Automation Action: Move Card

    Working in Legalboards- Automation Action: Move Card

    This guide covers how to create a move card automation action in Legalboards with examples of the automation in use.

    With this action, your cards can automatically move within the same board and/or be created on a different board. This capability can significantly improve your productivity because of the clarity, collaboration, and synchronization it provides to your workflows.

    If you want to learn more about automation or how agile methodologies can improve your practice’s workflows, check out some of our other resources or our YouTube channel for video guides of the Legalboards platform.

    Getting Started

    For the move card automation action specifically, the steps are as follows;

    1. On any board, click on the automation button on the header where a tab with options will open. Select “move card”;
    2. Set up a trigger (“when”) for the automation, and a filter; and
    3. Select which board and column you want the action to happen in- which needs a bit more clarification.

    Types of Movement

    With the last step of the creation process, you can choose where you want the card to move.

    The first option is “moves on this board” which will automatically move the card to another column within that same board.

    The second option is “creates card in another board“, where the card will automatically be created in a different board in a specified column.

    Either option allows you to organize chain events across boards. As tasks are completed for a work, the card movement will notify the relevant team members and depending on the type of movement, those members can create their own board. This allows you and your firm to work collaboratively and synchronized.

    “Move Card” in Action

    So, now that we’ve gone through how to create the action, let’s look at some example uses.

    1. Divorce Board:
      When a task regarding “Review Draft” (can either be in the name or even just mentioned in the description), has its status updated to “Done”. Certain cards from the “Property Settlement Agreement” column will then be moved to the next column-“File for master”.
    2. Immigration Board:
      When a Clio task regarding “Document Check” (can either be in the name or in description), has its status updated to “Done”. Certain cards from the “Initiate Case (Internally)” column will then be moved to the next column- “Case Identification”.
    3. General Workflow Board:
      When a card lands in the “Billing” column, then it will create the same card in a new board called “Accounting”. The card will be placed in the “Waiting for Approval” column within that new “Accounting” board.
    4. Lead Management Board:
      When a card stays for more than 30 days in the “Waiting Response” column, the system will move this card to the “Lost” column.

    Still need a little bit more help? Check out our support portal or find more resources here for more information.

  • Working in Legalboards: Immigration Board Template

    Working in Legalboards: Immigration Board Template

    When it comes to immigration matter management, Legalboards board templates allows immigration practices streamline their workflows and increase productivity.

    For example, activities related to visa issuance matters can easily be set up in Legalboards including various features to help move along the matter efficiently. (learn more about Legalboards’ features here),

    Board Features

    First, we’ll look at the general board features of lead management, workflow, and automating procedures in detail.

    1. Lead Management

    Let’s start with our lead management feature. We recognize that practicing immigration means facing a lot of competition. As such, we have created an efficient way for lawyers to manage and nurture leads so they could potentially become clients.

    This process is called “forms,” and is a personalized lead management tool included in our immigration board. Within this, you can customize forms and where they are presented. You can either upload the forms to your firm’s websites or send them through emails.

    Either way, this allows you to collect basic and preliminary information (e.g., type of case, contact information) from leads. Once those leads have completed the forms, their information will become a new “card” in the Legalboards platform. Now legal teams can keep their client’s information visually organized in a simple manner.

    2. Workflow

    The workflow feature in the immigration board starts with “columns” which represent different phases of a matter.

    In this visa issuance file example, the workflow comprises examples of both the internal steps related to the interaction of the firm and the client and the actual filing of the visa. As such, steps like “engagement letter and case identification” and “visa submission and visa issuance” are included as columns.

    Remember: Columns can be added, edited, and deleted in order to best suit your needs. Columns assist in managing the workflow of legal tasks from one to another and can help simplify you and your team’s understanding of the workflow.

    3. Automating Procedures

    We understand that a significant portion of a lawyer’s day is filled with activities that may not be translated into revenues. Using Legalboards, several repetitive activities can be automated. Automations can address cards, tasks, and emails in order to allow you to focus on more important responsibilities.

    Automations in Immigration Boards

    Next, let’s look at the automation capabilities within Legalboards. For our immigration board specifically, we use automations in three different ways- card and task creation, and sending emails.

    1. Card Creation

    Every time a new matter is created on a case management platform (like Clio, Docketwise, Practice Panther, etc), a new card will also be created in the “engagement letter” column. Because of this synchronization between integrated platforms, it eliminates the redundant and repetitive task of updating your management tools.

    2. Task Creation

    Tasks can be automatically created and assigned according to the movement of the case on the workflow. If you want to learn more about task creation within Legalboards, check out this resource.

    For example, when a client signs the retainer and the lawyer decides that an internal case can be initiated, the case will drop into the column “initiate case” and a new task will automatically be sent to the following team member. That team member can now proceed with the internal measures required to open the file and initiate the case.

    3. Send Emails

    With Legalboards, sending automatic emails to staff or clients is easy. Automated emails can be extremely helpful in promoting constant follow-up or serving as reminders of tasks that should be completed within a deadline.

    Immigration Matter Management

    As you can see from this generic visa issuance case, Legalboards is able to provide you with a flexible template to create an immigration board. By taking advantage of personalized forms, managing channel leads, and specialized columns and cards, you can simplify case management. Even better, you can set up automation of emails, cards, and tasks so clients can be your focus.

    You can learn more about automation within Legalboards in general here, see in action here, or check out our support portal for more help.

  • Working in Legalboards: How Does Automation Work?

    Working in Legalboards: How Does Automation Work?

    With Legalboards’ workflow automation system you can plan, organize, and work efficiently by automating actions. There are ten different types of actions you can automate in Legalboards, including creating tasks, sending emails, and moving cards. 

    You can also set standalone automation or combine them to create a powerful workflow system. This article will teach you how to organize your daily work by using automations in Legalboards.

    Getting Started

    You can follow these three easy steps to get started. The first two steps are common for all kinds of actions, while the last step is action-specific);

    Step 1: Set a Trigger

    First, choose when you want your action to happen. Your three trigger options are:

    • Card movement: when you drag/drop a card to a different column;
    • Pending time: when your card is more than X days at the same column or
    • Task update: when another task or set of tasks changes its status.

    Step 2: Set a Filter

    After choosing when your new action will happen, you have to filter which type of cards you want to see in this automation (all, matter, note, or contact). Each of these options will give you the choice to “Open more filters” or to customize “Advanced Filters” for each type of card.

    Step 3: Task Automation

    In this final step, you’ll choose which action you want to automate (Task CreationSend Email, or Move Card). In this example, we’ll focus on Task Creation.

    With Legalboards’ automating system, you can set up any combination of tasks with these three separate and powerful actions with the goal of boosting productivity through automation.

    Doing More with Automation

    When different teams are working in the same case matter, communication can become difficult. Fortunately, Legalboards can help you automate actions easily and efficiently.

    • Task Creation: When the same type of task must be completed for all case matters, you can easily automate the tasks for all cards that have moved from column “Property Settlement Agreement” to column “File for master”. You can also create another task for the same movement of cards, resulting in a multitude of actions with just one click.
    • Send Email: In every law practice, sending emails to request documents and other information is part of the routine. Beat that dull routine by creating the action “Send email”. This action automates this repetitive work and gives you more time to do what you love…practicing law!
    • Card Automation: With this action, your cards can automatically move within the same board and/or be created on a different board. This capability can significantly improve your productivity because of the clarity, collaboration, and synchronization it provides to your workflows. For example, you can set up an automation so that when a card is created in the “Billing” column on the Immigration Board, the same card is automatically cloned in another board. This was created specifically to manage the financial workflow.

    To read more about general workflow automation and the benefits it may bring to you, check out Task-chain Automation: What It Is and How To Use It In Your Legal Practice.

    Didn’t find the information you needed? Visit our Support Portal for more specific support.