Category: Getting Started

  • Working in Legalboards: Anatomy of a Board

    Working in Legalboards: Anatomy of a Board

    In this guide, we’ll walk you through Kanban concepts and the anatomy of a board in Legalboards. If you’re new to Legalboards or would like a refresher, this will help you understand all of the different aspects of a board.

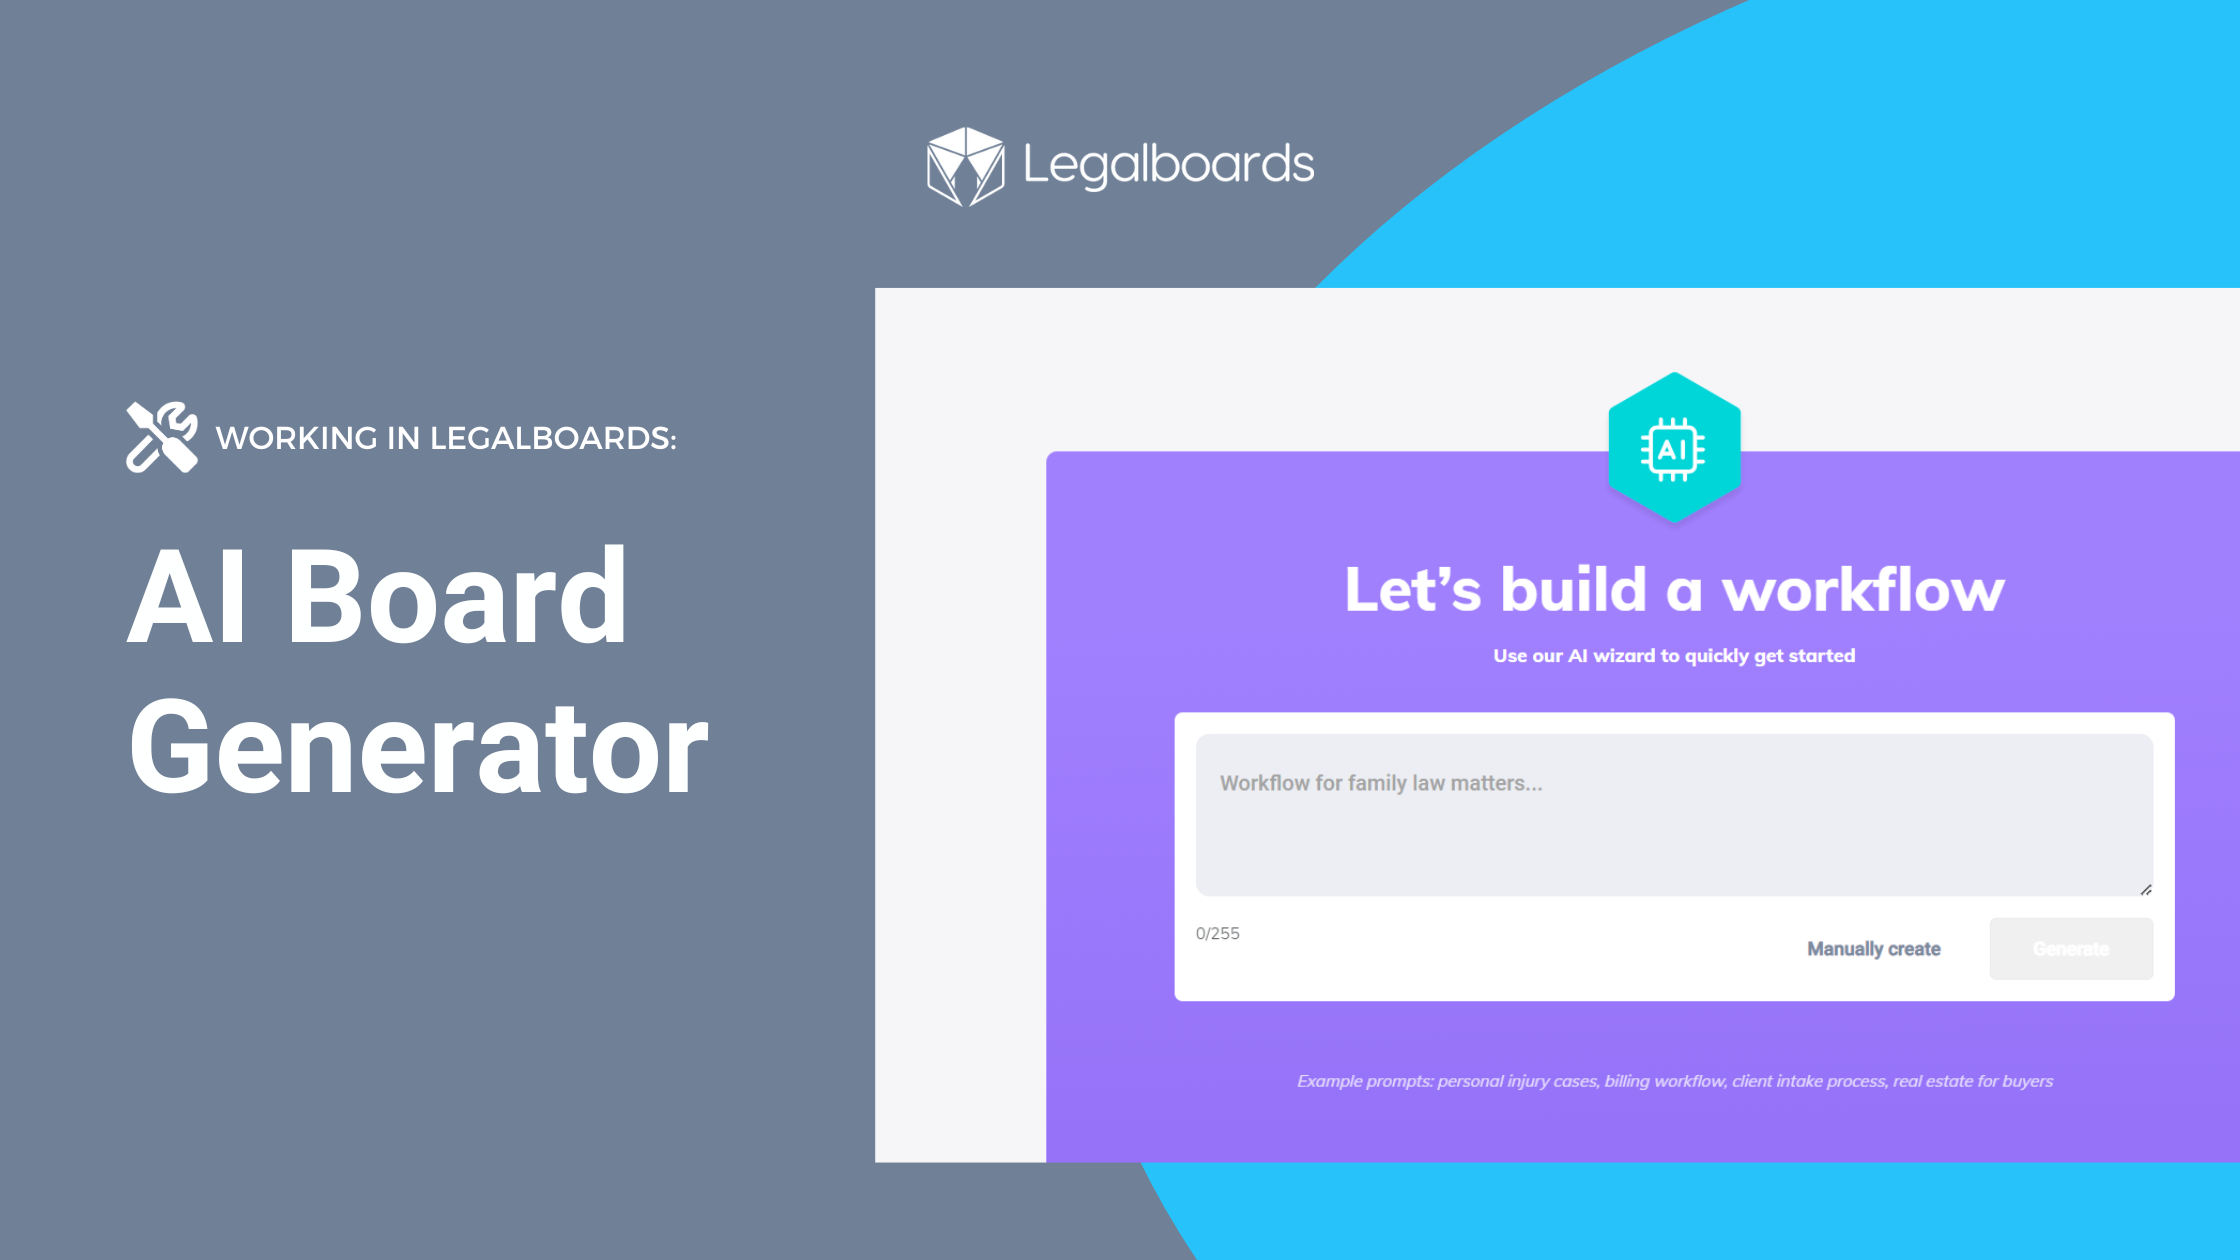
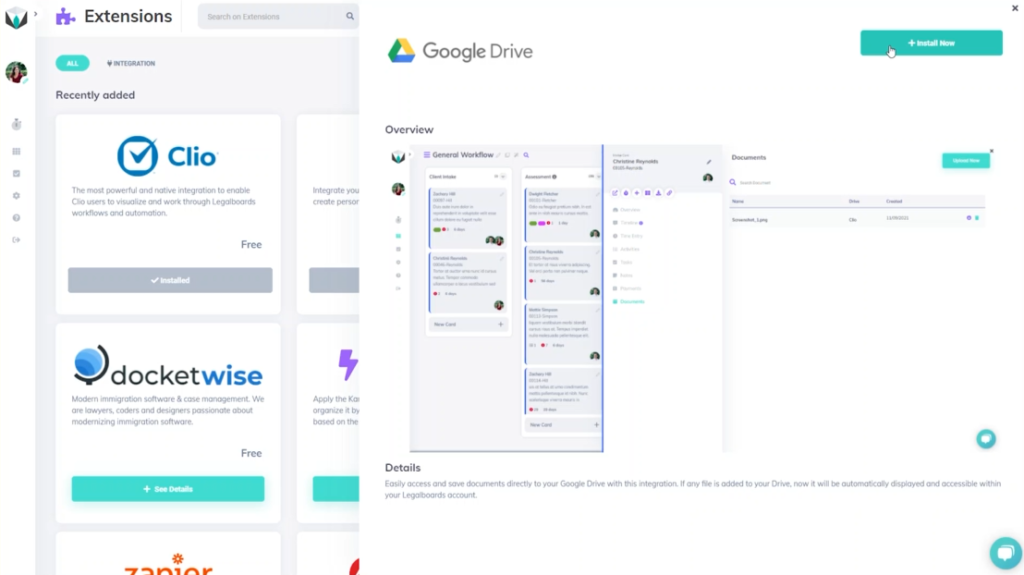
    If you’d like more information about how to build a board for your specific practice area or workflow, please get in touch with us at support@legalboards.com. Boards can also be built using our templates in the board gallery, the new AI board generator, or from scratch. 

    An Overview of Kanban

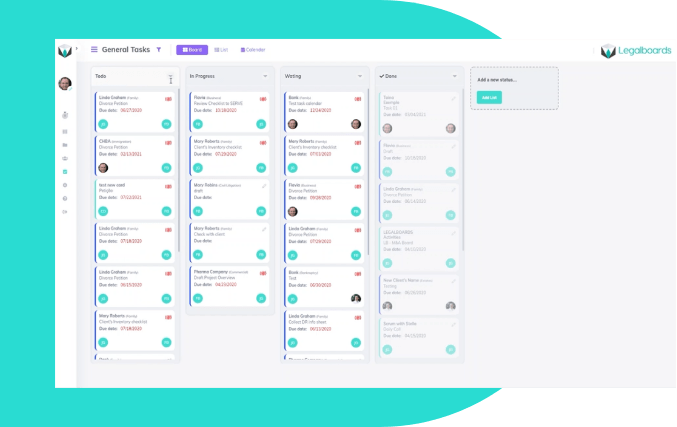
    Kanban methodology at its core is fairly simple to grasp. As you can see in the example Kanban board below, it’s a visual way to show the progress of work. Think of it as a timeline of the progression of your work.  The most basic Kanban boards show work as one of three phases: to-do, doing, and done and have cards representing different tasks.

    For many knowledge workers, it’s a great way to approach managing work. But, often this requires breaking down your entire workflow, so you may have a more complex Kanban board like the one pictured below. 

    A key concept of Kanban is that the goal is to get tasks to flow through the phases that are reflected in each column. No matter how basic or complex the Kanban board is, the work it represents needs to be completed with minimal delays. Kanban boards can be especially helpful for lawyers as a tool for managing all of their cases and related tasks. The phases, or columns, can reflect different steps of a process.

    For example, it could reflect the intake or billing processes or a specific practice area. These workflows often follow the same steps, but with so many things happening simultaneously, it may be hard to track. And, this is where Kanban boards shine.

    Basics of a Kanban Board

    Let’s go over the basics of the boards in Legalboards. If you’re more of a visual learner, check out the video below.

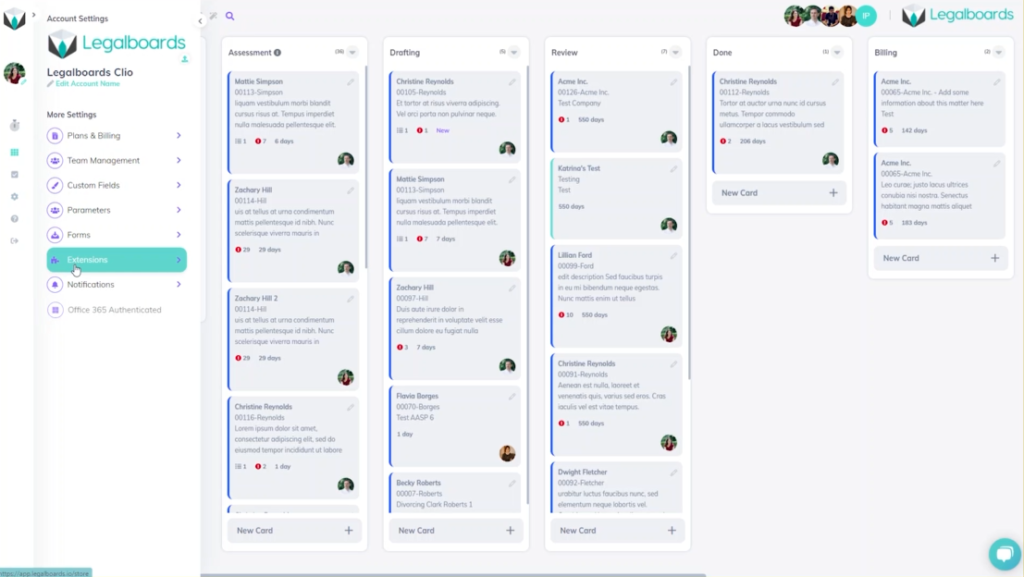
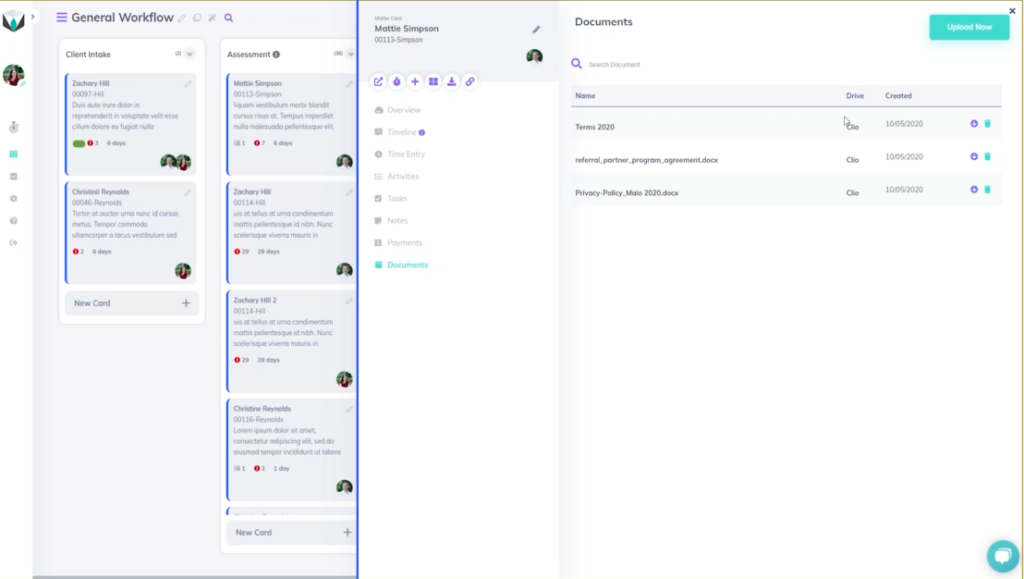
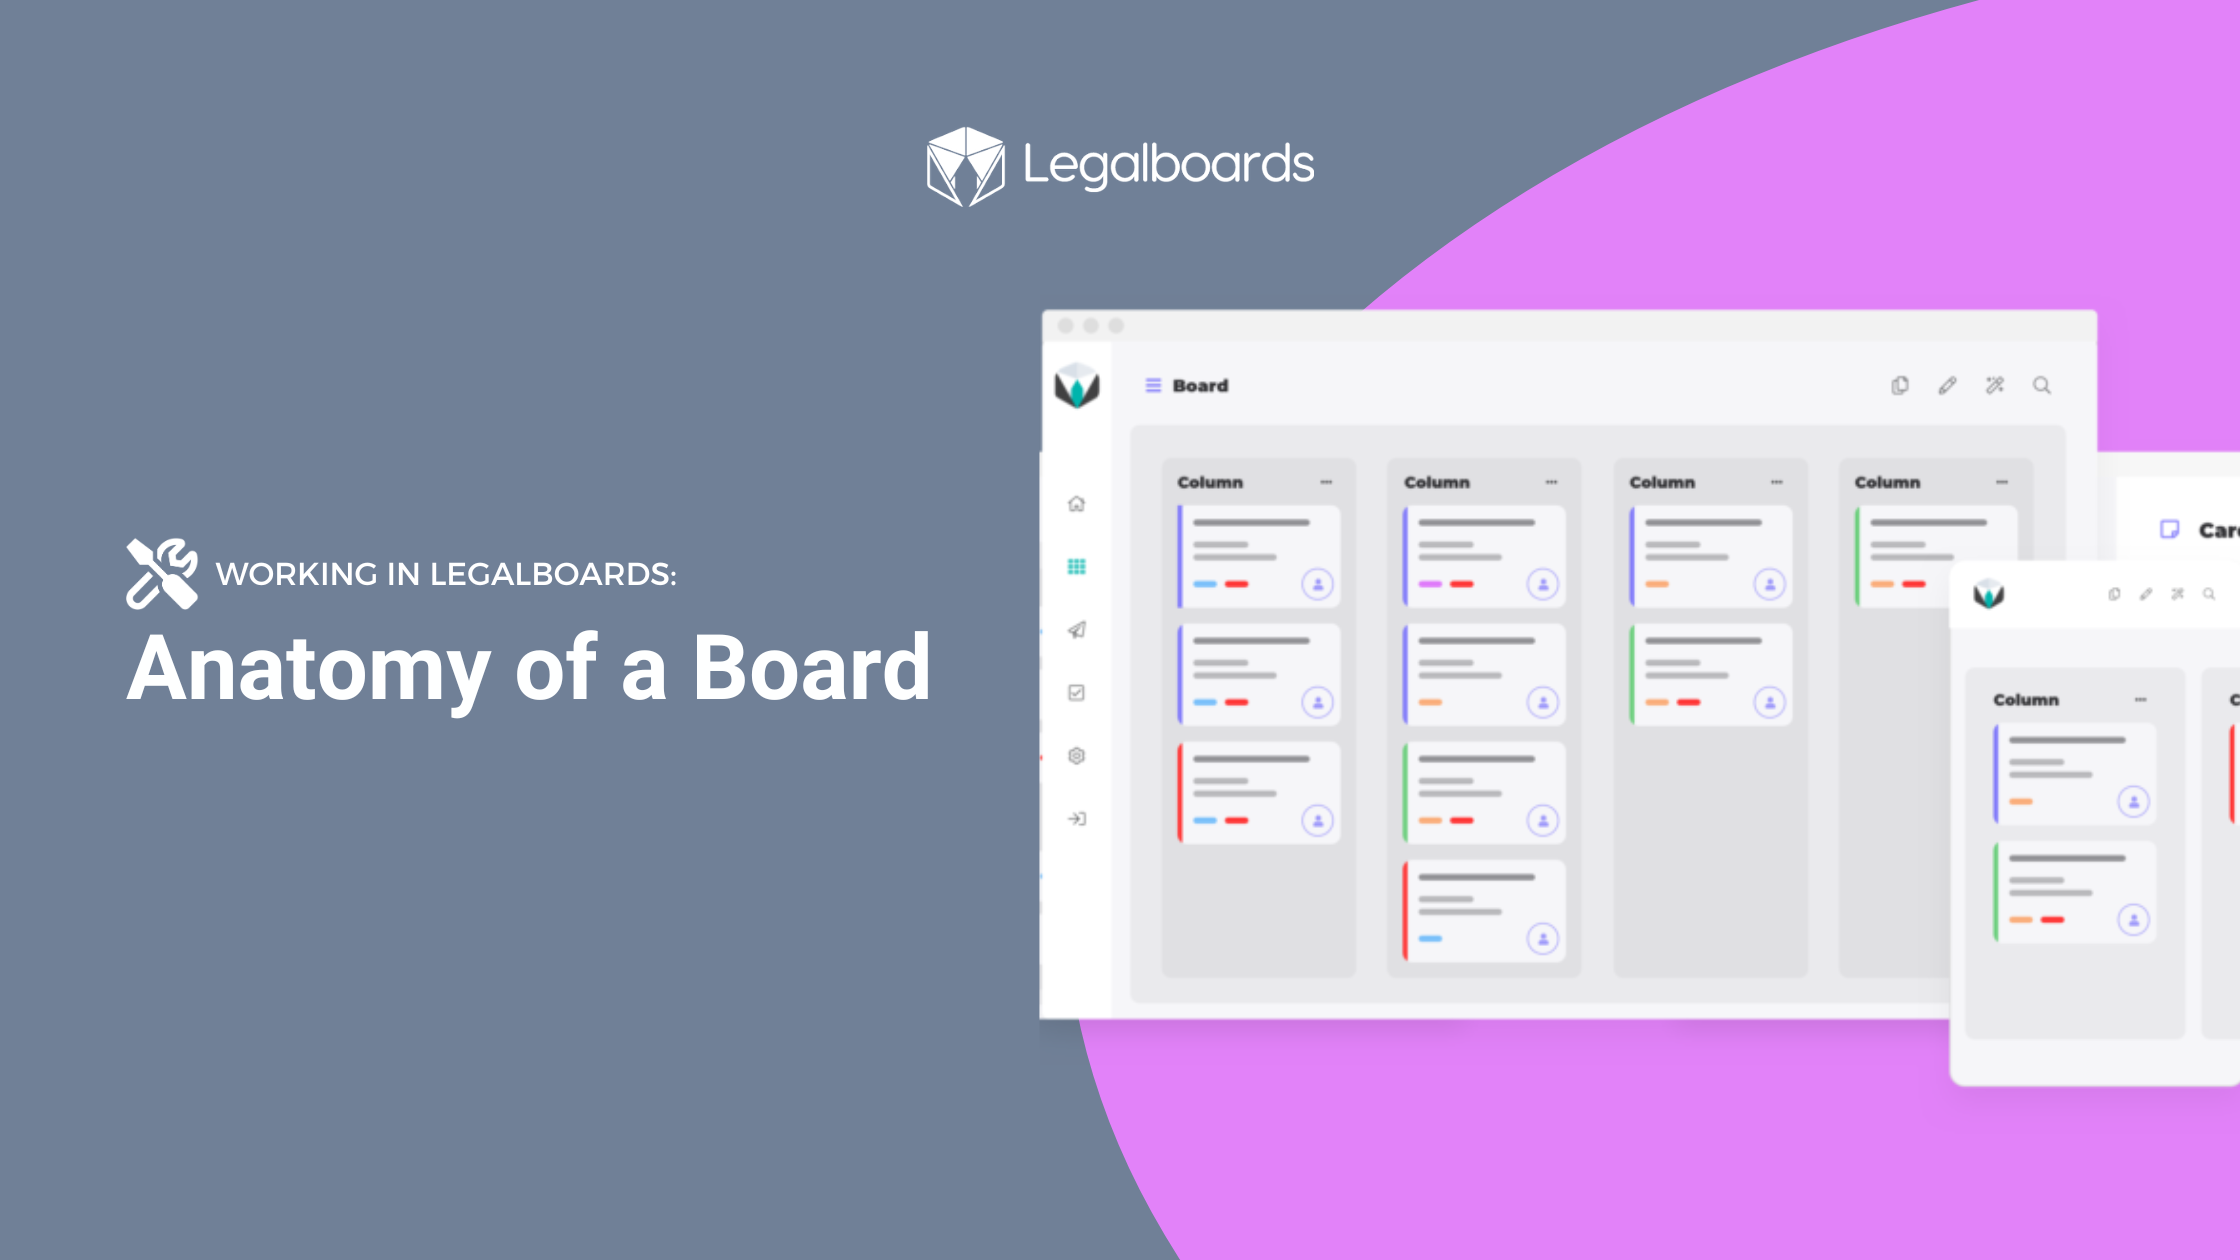
    Let’s move to the basics of a Kanban board in Legalboards. With the basic board, you’ll have cards that represent matters or cases, columns that represent a phase, and visual cues like labels. You can add cards based on your client’s name, matters from a third-party integration (like Clio or MyCase), and more.

    Boards can be organized in multiple ways. Depending on preference and workflow or process, boards can reflect a practice area, process (for example intake or billing), or by the attorney. Again, this organization is dependent on the workflow within a specific firm and what may be appropriate for one firm may not be for another. Most users use boards to reflect a specific practice area, and for our example, we’ll be talking about boards that are set up this way.

    In Legalboards, you can build board in one of three ways: from scratch, using a pre-built template, or our AI Board Generator Tool. No matter which approach you use, you’ll still be able to customize the board. You can move the columns, edit, or add new columns.

    To edit a column name, click on the arrow next to the title. Here, you can rename the column, delete the column, hide/show the archived cards, and sort cards by a specific order.

    While scrolling through columns, you’ll always see at the very end, “add a new column”. Here, it’s important to note that every column must be given a name before it is created and before cards are added, but you can change those titles at any time.

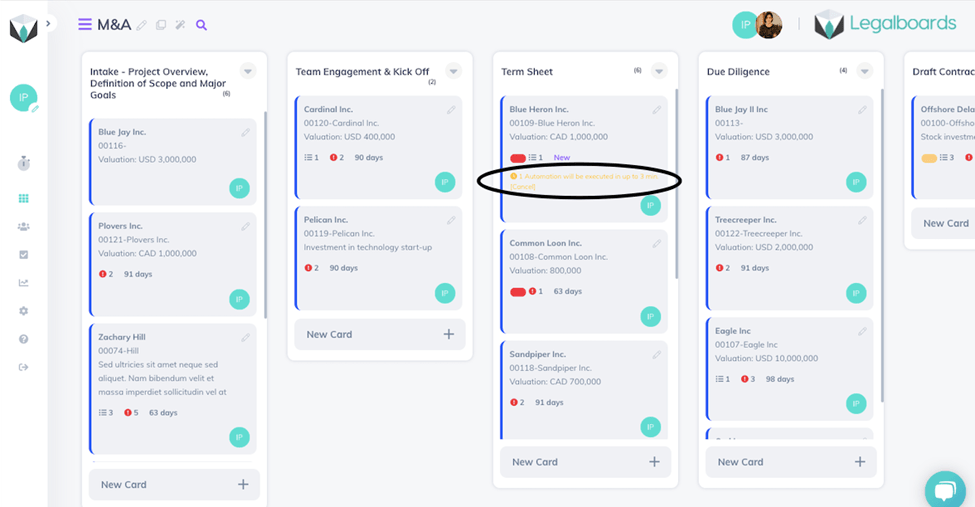
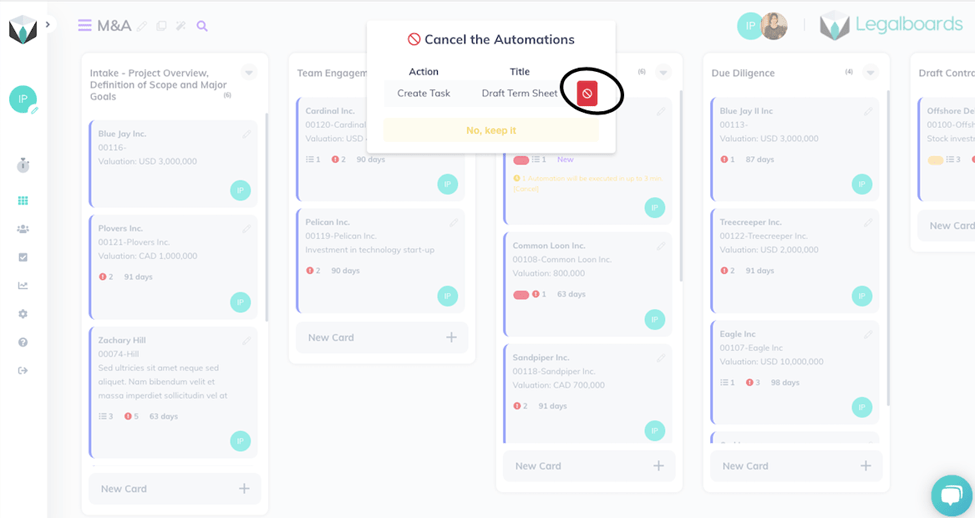
    On the right side of any board, you’ll see the board members as icons and the “My Automations” icon that allows you to create and manage automations on the board.

    Visualize Your Matters

    One of the main benefits of Legalboards is the ability to quickly see and understand your workflow. Some of our visualization features include labels, column colors and descriptions, task counters, filters (both simple and advanced), and the list option view.

    Let’s start with labels, these are ways for you to show directly on the card things like priority, or type of case, or some other nuance about the matter. Often this can depend on the practice area or the board organization. Along with labels, column colors, and descriptions allow you to quickly differentiate the different phases of the workflow.

    Some filters can be applied to a board. If we click on the “Advanced Filters” icon, we can set up a filter to view this board. This is helpful if you have a large board and want to find something specific. Check out the video below to learn more.

    You can filter the board by active cards, keywords, card members, responsible attorney(s), or labels. There is also the option to save the filter so it can be used at a later date. 

    To see the list option view, you can use the “toggle board view” button next to the board title to view the information differently. When you click this button, you’ll now see the matters in a drop-down list under headings that correspond with the board columns.

    While in this view, you can still move cards around and see the same information that you would in the board view. There’s also a search bar at the icons at the top that allows you to quickly search through the board for a specific keyword without using a filter.

    Board Management

    When you view a board in Legalboards, you’ll see icons at the top next to the board title (see below). These icons allow you to filter, edit, toggle views, or search your board.
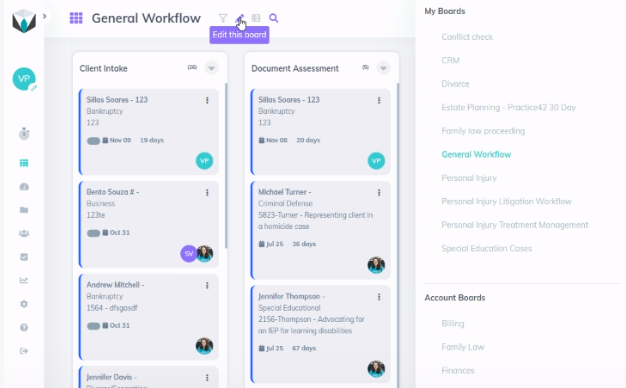
    Managing a Board

    From this menu, we can manage our board if we are a board admin. When we select “Edit this board”, a sub-menu will appear. On your left you’ll see your boards first and then other boards within your account. This is especially helpful for adding members to boards. Let’s talk about the first few options that help you manage your board first.

    From here, you can clone, export, or view the activity of the board through it’s log. Cloning a board can be helpful if you have automations to use this board as a template for a new one. You can select what elements you would like to be copied- the members, automations, and/or cards. If you select that cards will copied, you can also copy tasks. While copying, you can also edit the board title.

    If you choose to export the board, this will generate an Excel file where you can see each matter, each column, and everything related to those cards. This can be helpful depending on your integration to make sure that matters are being updated or to create custom reports based on data from Legalboards.

    Then, you have the log board option. This allows you to see the board activity. It allows you to see the timeline of activity on each card within the board. You’ll be able to see information like card movements, task updates, and automations by user and date. When a mistake happens and you’re troubleshooting an issue, this is a great place to start looking into any issues.

    Editing a Board

    You can also edit the board within this same sub-menu. Here you can edit the board title, description, permissions for members and viewers, labels, and card members, and delete the board if necessary.

    For permissions, “Disable automaton editing for members” and “Disable column editing for Members” are good options to allow admin-level members to control the board. These options act as a safety net to ensure who can make changes to automation settings for each one of your boards.

    The two hiding card options help prevent unnecessary viewing of cards. For members, this can help reduce the overwhelm of a regular member because they can only see the cards that they are involved in. With this option selected, they’ll be able to see the card, the column that it is in, and some information about it. Similarly, for viewers, this option is useful for giving restricted viewing options to clients. 

    Next is labels. Labels allow you to identify different details of a card. In our example, we use labels to denote the status (pending- external or internal, late, accepted, etc.). These are helpful visual cues as to what’s going on with a card without opening it. You can also change the titles and colors of these labels here as well.

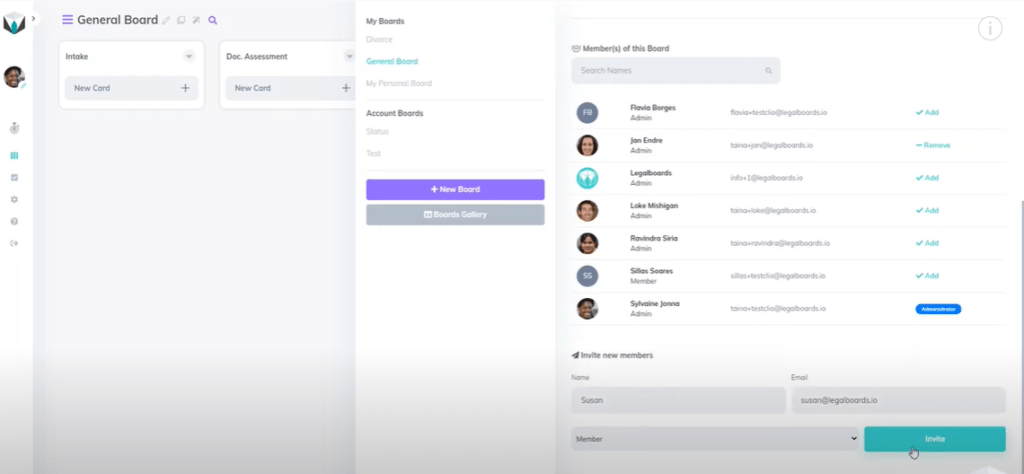
    You can also view and edit the board members from here. You’ll see a list of those with access and their level of access. As well as the user that created the board. If you need more help with this, check out our resource here.

    Finally, there is the option to delete this board. Please note that after deleting a board, you are unable to recover it. You can watch the video below for a recap of everything we talked about here.

    Still Have Questions?

    If you still have questions, we’re here to help!  You can contact us here, or check out our other resources.

  • Working in Legalboards: AI Board Generator

    Working in Legalboards: AI Board Generator

    With AI being more adopted within the technology industry, we’re excited to share more about how AI is being used in Legalboards. Legalboards’ AI board generator has been developed to help new and existing users build boards in just a few clicks.

    The AI board generator can help you reduce the time and stress of building boards so you can start streamlining your work with Legalboards’ capabilities.

    In this guide, we’ll walk you through how to make the most of the new AI Board Generator. 

    How does it work?

    Let’s start with how it works. A reminder that your board organization can be as specific or as general as you need it to be. Kanban boards are especially great for specific practice areas like immigration, estate planning, divorce, etc., but also for specific processes like client intake, contract review and management, and billing.

    If you’re more of a visual learner, you can check out the video below.

    https://website-backend.legalboards.com/wp-content/uploads/2023/11/new-board-ai.mov

    Step 1: Provide information about the board

    To build a board using the AI tool, simply go to the board menu and select “New Board”. From here, you’ll need to provide some information or context about the board you would like to create. You can provide detailed or general information. This is also called a prompt, which we’ll cover best practices about AI prompts next.

    A note on prompts

    A key concept to grasp when using AI tools is the idea that high-quality input creates high-quality output. For many AI tools, this input is called a prompt. That prompt needs to give the AI information about what it should create. From here on, a prompt refers to the information inputted into the AI tool to generate the board.

    While you can use a more generalized prompt, often the best results are from providing as much information as you can. For the context of structuring legal work, it’s entirely up to you. If you know your process, what you need at each phase of a case, and/or are comfortable providing details about your work, a specific prompt can be more helpful than a generalized one.

    It’s also important to note the importance of checking and reviewing work done by AI. As you may know from profiled cases, AI is not perfect. While our board generator is tasked with specific tasks, it still may require approval from your team before use. 

    Prompts in Legalboards

    In our example, we’ve provided some more information. Our prompt here is “My firm is starting to take on personal injury matters, I need a workflow for these cases, and for labels: Motor Vehicle Accidents, Workplace Injuries, Medical Malpractice, and Slip and Fall”. Here, the idea is to create a board that reflects the practice area of personal injury while also using labels to designate directly on the card the kind of case.

    Another example prompt, as shown below, could include ” a comprehensive Kanban board layout to manage multiple cases in estate planning in Michigan.” This prompt is great at capturing the nuance of a specific state or practice area that may be overlooked with a general prompt.

    https://website-backend.legalboards.com/wp-content/uploads/2023/12/Screen-Recording-2023-12-01-at-2.32.54 PM.mov

    If you need a more general board for any practice area or process, you can use a shorter prompt. For example, “personal injury”, “intake process”, or “estate planning workflow” are all great prompts for the tool.

    Once we’ve created our prompt, we’ll hit the “Generate” button. A note here- if you would rather manually create your boards, you can! Just hit the “manually create” button.

    Step 2: Generate your board

    Now that we’ve generated our board, let’s check if we’re happy with all of the column names and add automations. In our example, our column names are basic but we can see that the AI tool created for us the labels that we wanted.

    You can customize the boards to your needs, and the more general the prompt, you’ll likely have to customize the board if you need something more specific.

    For help with automations, you can check out our resources section or our YouTube channel. Or, contact us at support@legalboards.com to get help.

    Save time and stress while building boards with Legalboards AI

    By using the AI board generator, you can save time and stress while you’re getting set up. Setting up your board is the first step to streamlining your practice, but often can be the most demanding.

    You’ll need to populate boards before you can start using the automations to save time. But, once you’ve integrated your Legalboards account with your case management tool, you can use case data to populate your board automatically.

    For new users or practice areas, this helps you grasp the software easily. We’ve heard from current users about their onboarding process with Legalboards. Many said that creating boards took the most time and for some, required the steepest learning curve of mapping out their workflow. With the AI board generator, you can reduce both the time and stress of getting started.

    Once set up, you can take your boards to the next level with automations. Automating repetitive tasks like email reminders, client communication, event scheduling, checklist creation, and more can help you streamline your workflow.

    If you have any questions about the AI board generator or about Legalboards in general, please check out our support portal, resources, or contact us directly.

  • MyCase Integration

    MyCase Integration

    We’re excited to be teaming up with MyCase to help busy lawyers get (and stay) organized! The MyCase and Legalboards integration will allow you to get back to practicing law, not administrative tasks.

    By combining Legalboards and MyCase, you can start saving time while working in a new visual way. Legalboards provides some great advantages to MyCase users to help make their case management software run smoothly.

    Benefits of Integrating MyCase + Legalboards

    1) Legalboards Automation Capabilities

    Legalboards allows you to automate various aspects of your work. Common automations include sending email updates, checking in on clients after certain periods, checklist creation, and more.

    Automated emails are to be sent based on triggers like time or card movement, so team members (or even clients) can stay updated on their matter’s progress. The time trigger is especially helpful for ensuring the continued progress of matters.

    For example, if you have an inactive or delayed board, you can set up emails to be sent to the responsible attorney to check in on that matter. If you want to learn more about how these work, check out our automation resources.

    2) Visualizing and Organizing Your Work

    With Legalboards you can easily visualize and organize your matters. The minimal Kanban user interface allows you to see at a glance what stage your matters are at without having to open each case file. Through customizations to the board, you can tailor your account to reflect your workflow accurately.

    As you can see in the screenshot below, how your work is progressing in Legalboards can be understood at a glance. It’s up to you how customized you want to make your board/cards. With the customization capabilities, you can add checklists and custom labels (including colors) to cards so you can quickly navigate your matters.

    Within the task center, Legalboards also has a calendar view so you can see your matter’s timeline in a simple format.

    3) Two-way Synchronization

    By integrating MyCase, your data will be automatically synced. Because of this, you won’t need to input your data twice. The specific fields that are synced between MyCase and Legalboards are the following;

    • Contact information: first and last name, email, and phone number; and
    • Matter information: name, case number, opened date, practice area, description, SOL date, and clients.

    Get Integrated

    To use the MyCase integration, you’ll need to first connect your MyCase and Legalboards accounts. Learn how to do so in the video below;

    Learn more about this integration here, or contact us for more help!

  • Benefits of Adding Legalboards to Your Clio Account

    Benefits of Adding Legalboards to Your Clio Account

    Many professionals- in any industry, are grappling with what combination of software and devices works best for them. As we move into fully remote or hybrid work environments, it’s clear that using multiple devices/software is the best way to get things done.

    For software specifically, a combination of multiple programs can be the best solution for optimizing how we work. However, it’s important to keep in mind that software should work with you to complete tasks. And a common challenge is finding the right combination of programs to include in your tech stack.

    Within the legal industry, a leading software designed specifically for lawyers is Clio. And the benefits of adding Legalboards to your Clio account are clear.

    Legalboards allows Clio users to visualize their workflow, simultaneously update files/data, and automate tasks within workflows. You can read more about this in this article.

    With Legalboards’ features focused on getting your tasks organized, you can enhance the data you already have in Clio. By integrating Legalboards with Clio, we can help you automate tasks and visualize your work. Using automations can be a great place to start getting organized, so let’s focus on it first.

    1) Legalboards Automation Capabilities

    Legalboards allows you to automate various aspects of your work. Common automations include sending email updates, checking in on clients after certain periods, and more.

    Automated emails to be sent out for triggers like time or card movement so clients (and even team members) can stay updated on their matter’s progress. The time trigger is especially helpful for ensuring the continued progress of matters.

    For example, if you have an inactive or delayed board, you can set up emails to be sent to the responsible attorney to check in on that matter. If you want to learn more about how these work, check out our automation resources.

    2) Visualizing and Organizing Your Work

    With Legalboards you can easily visualize and organize your matters. The minimal Kanban user interface allows you to see at a glance what stage your matters are at without having to open each case file. Through customizations to the board, you can tailor your account to reflect your workflow accurately.

    As you can see in the screenshot below, how your work is progressing in Legalboards can be understood at a glance. It’s up to you how customized you want to make your board/cards. With the customization capabilities, you can add checklists and custom labels (including colours) to cards so you can quickly navigate your matters.

    Legalboards screenshot

    By integrating Clio, your data will be automatically synced. Synced data means you don’t need to input updates twice. Within the task center, Legalboards also has a calendar view so you can see your task’s timeline in a simple format.

    3) Get Integrated

    By integrating your Clio account with Legalboards you can get organized and save time through our automation capabilities and easy-to-understand interface. These are just two of the benefits of adding Legalboards to Clio, and some can be specific to practice areas.

    Find us in Clio’s App Directory here, and start your free trial with us here.

  • Managing Board Members

    Managing Board Members

    At Legalboards, we want to help you and your team collaborate more effectively. One of the ways to improve how your team works is adding board members to your Legalboards account. These members can be view-only or have the ability to make changes, so you can work effectively, so managing board members is easier than ever.

    In this guide, we’ll walk you through how to manage board members within your Legalboards account. If you’re more of a visual learner, check out the video guide below or on our YouTube channel.

    Managing Board Members

    Editing Board Members

    Managing board members in Legalboards is easy. The first step is to go to a board and click on the pencil icon (“Edit this board”) next to the board’s name.

    From here, we can add, edit, or invite new members to the board we select, as seen below.

    We can easily add or remove members by clicking the “Add” button next to a name. When members are added, this icon will change to “Remove”, which allows you to remove them from the board. Also remember that you can edit members at any time!

    Inviting New Members

    If we want to invite new members, we’re going to scroll down within the menu to the heading “Invite New Members”. To invite a new member, we just need to provide their name and email and then select what kind of permission they will have.

    Types of Permissions:

    • Admin: Admin permission allows a member to manage all features. These members can use boards that are shared with them and create their own.
    • Viewer: Viewers can only access the boards that are shared with them but do not have permission to make changes.

    Once we’ve selected a permission type, we’ll click on the “Invite” button to invite that person to the board, as seen below.

    Once that invite has been sent, the person will appear under the “Invite New Members” heading similar to the “Member(s) of This Board” heading. If you want to change this, you can also hit the remove button.

    Need Some More Help?

    Didn’t find what you needed? Learn more about other features in Legalboards by checking out more videos or visit our support portal for more help.

  • Avoiding Duplicate Tasks

    Avoiding Duplicate Tasks

    A common issue we’ve heard from users is about duplicate tasks being created within a board. But, how can you effectively avoid duplicate tasks?

    There are many strategies, but today we’ll focus on combating one of the underlying problems- abnormal card movements. By knowing how to deal with moving a card backwards, we can avoid duplicate tasks.

    Abnormal Card Movements

    When we use a Kanban board, each column in our workflow represents a phase in our process. We expect the cards to be moving from left to right until the reach the last phase. However, sometimes it’s necessary to go back one step for a particular matter, therefore moving the cards from right to left.

    Sometimes, duplicate tasks can be created from moving a card backwards. If, for any reason, you identify that a matter is in the wrong column and you want to move it to a previous column (to the left), it’s important to keep in mind how this may trigger an automation.

    In our example, we’ve identified a matter you want to move. We want to move a matter from “Due Diligence” to “Term Sheet”. By doing this however, we will trigger the automation to create the task “Draft Term Sheet”.

    If you don’t want this duplicate task to be created, click on the yellow message on the card (as seen below).

    When you click on this yellow warning text, a pop-up will appear that allows you to cancel the automation (below).

    By doing this, no duplicate task has been created and we have successfully avoided any duplicate tasks that may arise with a backwards card movement.

    Still Need Some Help?

    Didn’t find what you needed? Learn more about automations in Legalboards here, check out more videos, or visit our support portal for more help.

  • LawPay Integration

    LawPay Integration

    Legalboards and LawPay are both simple, user-friendly, and smart tools for an agile legal practice. We know that today’s lawyers are strapped for time. That’s why we’ve integrated Legalboards and LawPay so you can boost your productivity with the help of experts.

    Through the use of agile methodologies, the Legalboards platform allows you to increase workflow efficiency. By integrating LawPay within your system, now you can improve the legal payment part of any matter.

    How to Set Up The Integration

    Let’s walk you through how to get started with the integration. If you’re more visual, you can also follow with our video guide on YouTube.

    Getting Started in Legalboards

    First, you’ll need a Legalboards account to integrate LawPay to. If you already have a Legalboards account, you can skip to the next section (Adding LawPay to an Existing Account).

    You can create a new Legalboards account either directly from the Legalboards sign-up page or through the LawPay and Legalboards sign-up page.

    After you submit either form, you will be transferred  to LawPay´s authentication page. Now you’ll need to sign-in with LawPay in order to authorize Legalboards´ access so we can connect with the LawPay system.

    After authorizing Legalboards integration in LawPay, you will be sent back to Legalboards. Now you can use Legalboards to create your workflows and automations while managing your payments through LawPay.

    Adding LawPay to an Existing Account

    If you already have a Legalboards account, adding the LawPay plugin is very simple. You just need to sign in to Legalboards as an admin permission user and then go to Settings > Extensions.

    Find the LawPay icon and click on “See Details” then “Install Now”.

    After confirming your choice, you will be sent to the authentication page in LawPay, sign in there, and authorize Legalboards to be integrated with LawPay. Now you can also use Legalboards as you normally would but have LawPay’s legal billing and payment management capabilities.

    How to Use the Integration

    Now you should have both accounts linked, which allows them to be synchronized. When you open the car’s detail and click on the Payments tab (located on the left side of the screen), you’ll be able to see all bills created for any card that has an email linked, such as contacts or matters.

    You can also create a new bill for any contact or matter that you have on Legalboards, again, with the caveat that the contact/matter has an email attached to it.

    To see the full capabilities of the LawPay integration, open a card that contains an email and then select “New Bill”. Fill in the form as you need, and save. The new bill will be created in your LawPay account directly, and your client will be notified about this open bill.

    Once the client pays the bill, Legalboards and LawPay will both automatically update. Because the two platforms are synced, you don’t need to monitor and manage both platforms.

    If you still need help or have any questions, check out our support portal, contact us here, or check out other resources about the integrations Legalboards offers here.

  • Google Drive Integration

    Google Drive Integration

    In this guide, we’ll walk you through how to set up and start using the Google Drive integration within Legalboards. Keeping files attached to matters (or cards in Legalboards), can be difficult. File management is often the key to staying organized so you can continue to be productive.

    Our new Google Drive integration allows you to access your files within your Google Drive in your Legalboards account. Now, you can access your files in real time. As well, thanks to the automatic syncing between the Drive and Legalboards, it’s easy to keep matters on track. Even if you’re sending a file found inside a matter, the file is synchronized to reflect any changes made.

    If you’re more of a visual learner, check out our video guide below, or on YouTube. If you need more explanation on how to get started within Legalboards, check out our support portal for more help.

    Integrating Google Drive with Legalboards

    In Legalboards, we’re going to find the “Settings” icon on the left of the screen and select it. In the sub-menu that will appear, we’ll then select “Extensions”. We’ll then be taken to our collection of extensions where we’ll select the free Google Drive integration to be added.

    Google Drive integration screenshot 1

    When you select the Drive, you’ll see an overview of what it looks like while in use within Legalboards. From here, we’re going to select the “Install Now” button to add the Drive to our account.

    A confirmation pop-up will appear to make sure that we want to add the Drive to our account and once we’ve confirmed, we’ll need to authorize Google Drive. This is very simple, we’re just going to select the Google Account we want to connect and sign in. From here, we’ll see what Legalboards can access in your drive (i.e. see, edit, create, and delete files within the Drive, view pictures, etc.).

    After allowing Legalboards to access our Google Drive, the plug-in will be installed. From this screen showing the successful installation, we’ll go to our boards.

    What Does the Integration Looks Like Within Legalboards?

    Now that the Drive has been successfully added, we’ll take a look at how it works within Legalboards. We’ll click on a card (matter) and an overview of that card will appear. From the card’s sub-menu, we’ll select the “Documents” option to see any associated files with the matter.

    In our example, we have three associated files with the card. This screen tells us the name of those files, where they came from (i.e. Clio in our example), the date they were created, and allows us to delete files. We also can use the “Upload Now” button to upload new files- which we’ll do now.

    In the sub-menu that will appear we can now select “Google Drive” as a source and select which files from the Drive we want then save. Now we can see four files- three from Clio and one from Google Drive.

    What Does This Look Like Within Google Drive?

    So we know what the integration will look like within Legalboards, but what about in our Drive? As seen below, a folder called “LegalboardsDocuments” will have a sub-folder called “Matters”. When we select this, folders for associated matters will be created with the same name they have in Legalboards.

    Within that matter’s folder, the associated files they are connected to will be in the Drive and will be updated to reflect any changes made in Legalboards.

    Didn’t find what you needed? Check out our support portalcontact our team, or check out our other resources for help using Legalboards.

  • Working in Legalboards: How Does Automation Work?

    Working in Legalboards: How Does Automation Work?

    With Legalboards’ workflow automation system you can plan, organize, and work efficiently by automating actions. There are ten different types of actions you can automate in Legalboards, including creating tasks, sending emails, and moving cards. 

    You can also set standalone automation or combine them to create a powerful workflow system. This article will teach you how to organize your daily work by using automations in Legalboards.

    Getting Started

    You can follow these three easy steps to get started. The first two steps are common for all kinds of actions, while the last step is action-specific);

    Step 1: Set a Trigger

    First, choose when you want your action to happen. Your three trigger options are:

    • Card movement: when you drag/drop a card to a different column;
    • Pending time: when your card is more than X days at the same column or
    • Task update: when another task or set of tasks changes its status.

    Step 2: Set a Filter

    After choosing when your new action will happen, you have to filter which type of cards you want to see in this automation (all, matter, note, or contact). Each of these options will give you the choice to “Open more filters” or to customize “Advanced Filters” for each type of card.

    Step 3: Task Automation

    In this final step, you’ll choose which action you want to automate (Task CreationSend Email, or Move Card). In this example, we’ll focus on Task Creation.

    With Legalboards’ automating system, you can set up any combination of tasks with these three separate and powerful actions with the goal of boosting productivity through automation.

    Doing More with Automation

    When different teams are working in the same case matter, communication can become difficult. Fortunately, Legalboards can help you automate actions easily and efficiently.

    • Task Creation: When the same type of task must be completed for all case matters, you can easily automate the tasks for all cards that have moved from column “Property Settlement Agreement” to column “File for master”. You can also create another task for the same movement of cards, resulting in a multitude of actions with just one click.
    • Send Email: In every law practice, sending emails to request documents and other information is part of the routine. Beat that dull routine by creating the action “Send email”. This action automates this repetitive work and gives you more time to do what you love…practicing law!
    • Card Automation: With this action, your cards can automatically move within the same board and/or be created on a different board. This capability can significantly improve your productivity because of the clarity, collaboration, and synchronization it provides to your workflows. For example, you can set up an automation so that when a card is created in the “Billing” column on the Immigration Board, the same card is automatically cloned in another board. This was created specifically to manage the financial workflow.

    To read more about general workflow automation and the benefits it may bring to you, check out Task-chain Automation: What It Is and How To Use It In Your Legal Practice.

    Didn’t find the information you needed? Visit our Support Portal for more specific support.

  • Legalboards and Clio

    Legalboards and Clio

    For today’s time-strapped law firms, being able to collaborate effectively with your internal team and external clients has never been more critical. With so many matters on the go, it’s easy for tasks and deadlines to slip through the cracks, with potentially devastating results for your firm, and a poor client experience.

    Luckily, there are a wide variety of technologies available to help law firms combat these problems. These solutions manage the firm’s caseload, gain visibility into their workflows, and identify and fix gaps in procedures. In this post, we’ll look at how law firms around the world are using Legalboards and Clio, the world’s leading cloud-based legal software, together, and the benefits they’re enjoying as a result.

    Living Better Through Integration

    Firms using Clio to manage matters, contacts, and billing already have a significant advantage over the competition. They see improvements in firm productivity and accessibility. By adding Legalboards to the mix, Clio can be even more powerful.

    Legalboards and Clio integration

    Legalboards is visually based with a user-friendly dashboard that gives firms access to the information they need at a glance. However, sometimes choosing additional solutions to pair with Clio can result in wasted time. This can be from entering redundant information into both systems—but with Legalboards, this doesn’t happen.

    By integrating Legalboards and Clio, law firms can eliminate dual data entry between the two products. This is because information about matters, tasks, notes, time entries, payments, and even custom fields are automatically synced.

    This eliminates unnecessary time spent by admin and legal staff entering client or case information into two systems and reduces the risk that information is entered incorrectly.

    Visual Learners

    Law firms have a lot of moving pieces and firm deadlines (no pun intended). Filing dates, court dates, and client meetings are key obligations. Each of these obligations carries its own list of required work, and drastic consequences if deadlines are missed.

    In fact, failure to meet deadlines is listed as a leading cause of legal malpractice. This only grows in frequency with more staff members being associated with a particular matter.

    A big benefit of the Legalboards/Clio integration is the ability to apply an easy-to-understand visual layer to Clio’s data. Legalboards provides a visual timeline of matter status, tasks, and upcoming deadlines.

    Legalboards: The Visual Matter Management Software

    It also gives everyone working on a matter a clear understanding of what work needs to be done, and by when. This will help firms ensure they’re meeting their professional obligations, identifying breakdowns in processes and workflows, all while delivering a great client experience, every time.

    Automations

    For law firms not using automation, you’re at risk of falling behind. Thanks to software and integrations, law firms are now able to automate workflows. Automations help reduce the risk of error and save valuable time by letting software handle unnecessary busy work.

    With Legalboards’ automations, law firms are able to plan and organize efficiently by automating actions such as: creating tasks, sending emails, and moving cards.

    Automation can be created at the matter level, or at the account level to apply the same task creation for each matter (or client) entering the pipeline. If you’re a high-volume firm or practice group managing a lot of similar cases, this feature can be invaluable.

    It could save countless admin hours that can be focused on doing something more valuable for the firm—like acquiring new clients. For businesses that bill out at hundreds of dollars an hour, every second counts.

    Benefits of Using Legalboards and Clio

    By integrating Legalboards and Clio, law firms can supercharge their Clio experience to operate more efficiently and on schedule. The combined software also provides firmwide visibility into the workflow in order to serve clients effectively.

    See how Legalboards can give your Clio account superpowers—book a demo today.

  • Visual Matter Management

    Visual Matter Management

    Law practices are now increasingly reliant on technology to manage matters and legal operations. However, without proper processes and workflows technology becomes counterproductive to efficiently managing a matter to close–costing you time and depreciating your firm’s technology investments.

    As co-founders of Gimbal and attorneys with decades of experience, Karen Dunn Skinner and David Skinner have helped thousands of lawyers increase the productivity of their practices by implementing successful legal project management principles.

    Join Karen and David in this Legalboards webinar as they share insights on:

    • Framework on better management and tracking of matter progression throughout litigation
    • Visualizing tasks and activities and the benefits of utilizing a Kanban board
    • Understanding the benefits of agile and technology for law practices

    Meet The Speakers: Karen and David from Gimbal Canada

    Karen Dunn Skinner is the co-founder and CEO of Gimbal Canada. She’s a Lean Six Sigma Black Belt and an attorney with over 20 years of experience practicing law in Canada and Europe.

    David Skinner is the co-founder and President of Gimbal Canada. He’s a certified Lean Six Sigma Sensei with over 20 years experience practicing law. David spent more than 10 years in large, international law firms in Canada, Europe, and the UK.

    Follow Gimbal on social media to get updates and tips on LinkedInTwitter, and Instagram.

    Watch The On-Demand Webinar

    Want to Learn More?

    Check out more about Kanban, matter management, and more in our resources.

    Ready to get started? Sign up for a free trial with Legalboards and see how a visual matter management system can improve how you work.